Sewing Vloggers

Monday, September 29, 2014

The Ikat Jacket, Simp 2153, again!


This really is meant to be a lightweight summer jacket but Mother Nature and my constant recent delays made for some Autumnal modeling shots today. I really like  this jacket and will get a lot of use out of it. Our summers are generally in the fifties at night so a lightweight jacket is a must. Factor in a lot of jeans wear and I think this will become a staple in the closet. Here's the 411:

Pattern: 
This is Simplicity 2153. It is the same jacket I used for the Threads Fall Jacket Challenge last year. A good anorak pattern is a great thing to have in the stash and this may not be the last time I make this. I can see me making it in some rainwear as well.

The pattern itself is fairly easy but I made quite a few changes and because of those changes did not follow the sequence in the pattern. More on that..........

Fabric:
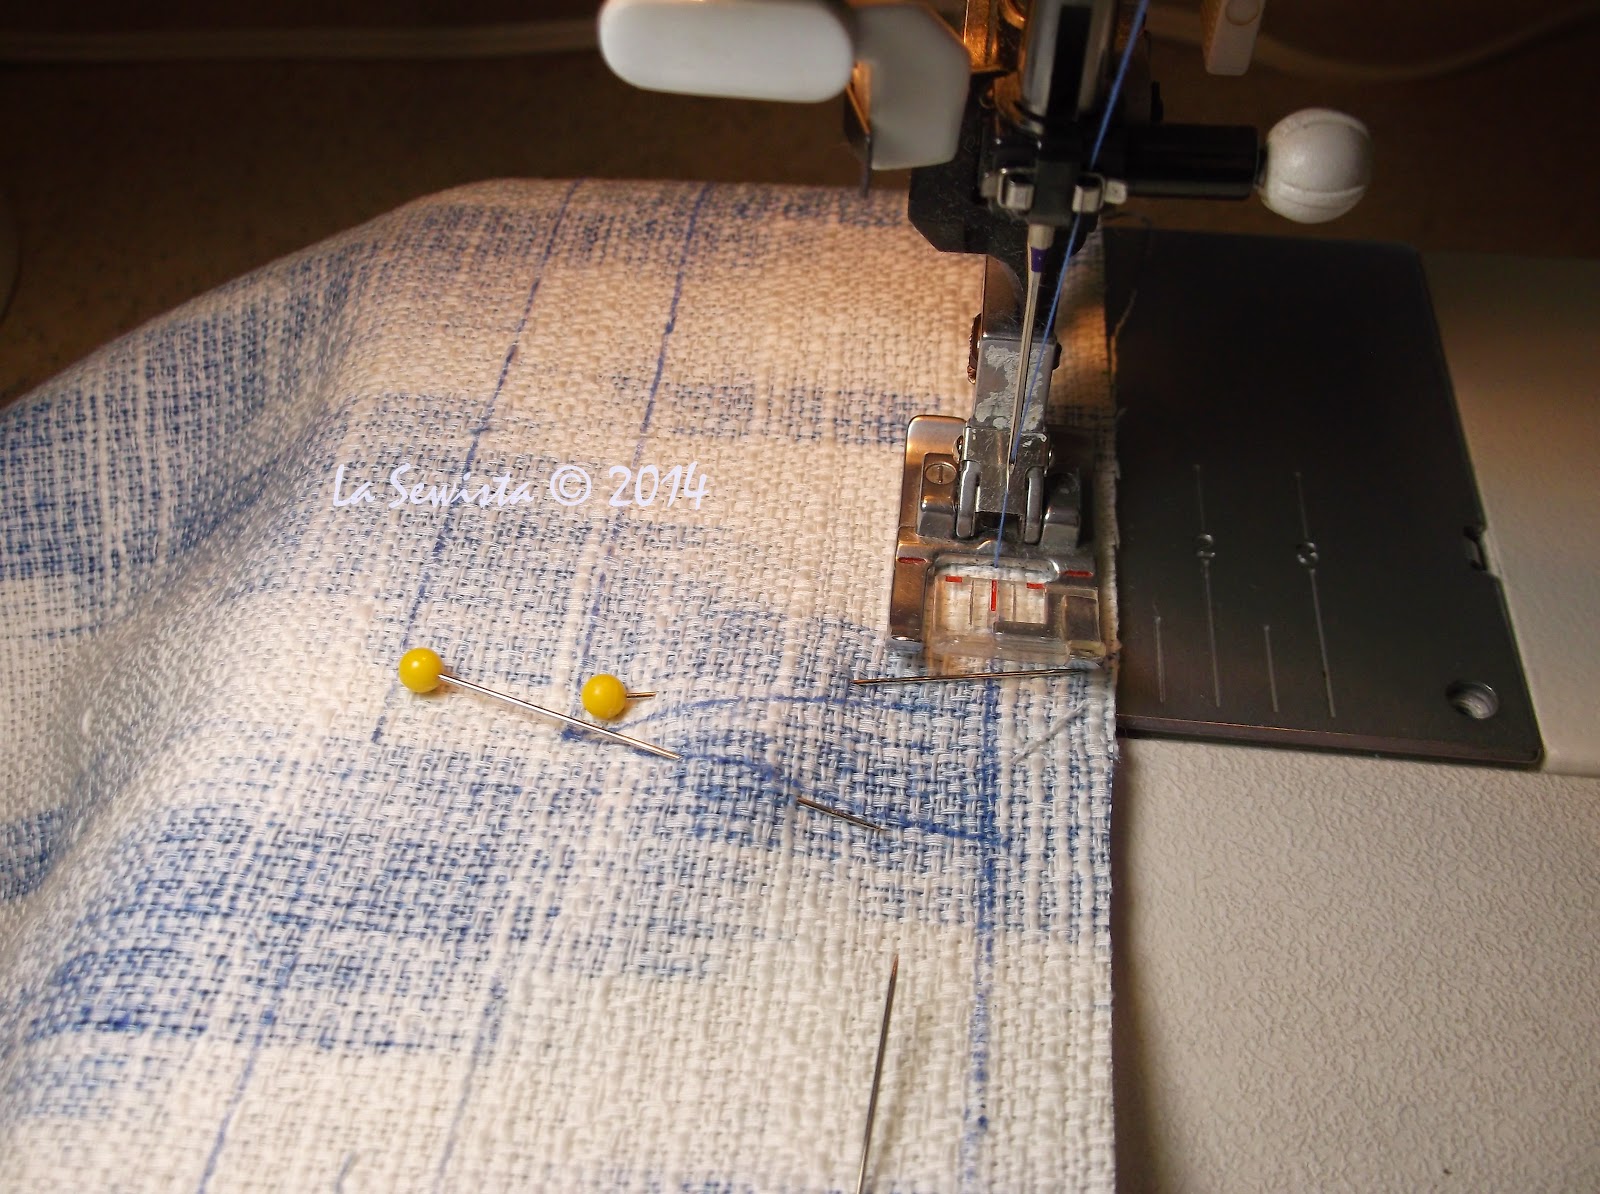
This is 100% cotton home dec fabric, maybe, just maybe from Fabric.com. I do know the selvedge says it is a Raymond Waites design called "Tincia" (?), can't tell. It's hard to read. It also says it was made for Mill Creek Fabrics. I love the texture. It is like a heavy textured linen which you can see better here.

I prewashed this fabric removing the "soil and stain repellant finish" listed on the selvedge but it got a really nice soft hand to work with after that, more like clothing. I love to sew with home dec fabrics. I can't remember one, even tapestries, that I didn't throw in the washer and dryer. It softens them up and makes them much more wearable and sewable. Don't hesitate to look at home dec fabrics next time you are shopping. 

The lining is rayon Bemberg lining. Interfacing is a woven from Fashion Sewing Supply. Have to get more of their product as I am close to out!

Construction:

I made quite a few changes. The pattern does not specify a lining. I did a bound lining (formerly named flat lining) that you can see how to do here. It gives a really nice finish to a more casual garment like this. This fabric was quite ravelly and I am glad the seam edges were bound from the beginning.  The bodice pieces were all flat lined before starting construction. The sleeves were lined using the Nancy Zieman method which can be found in the tutorials. The armscye edges were bound with Bemberg lining. 

This pattern does not have a facing that goes around the neckline. I made one and much prefer how that finished up with the bound edges compared to a partical facing and lining run up to the neckline. I've never been a fan of that technique. 

I dropped the casing down a half inch as I felt it was a touch too high in the first iteration. 

Pockets were cut on the bias simply to add a bit of interest and to help the fabric move away from the home dec vibe. The hip pockets were cut at a slant with cuff. Rivets were used to secure the pocket corners and were intentionally put in upside down as I liked the back of the rivets better than the front. Pockets were topstitched with a triple stitch. 

I used simple drapery cord for the cording which I may change if I find something better. I am not 100% happy with that and am still looking. There is a pony bead at the end of each cord, simple, and cord locks at the waistline . 

I added two inches to the length which I find kind of interesting as I am only five feet tall. So watch the length if you make this. I faced the hem instead of folding it up. 

Split cuffs were added to the sleeves with a deep facing. The sleeves on this run huge. I took a good inch out of the width. Usually I am adding width to accommodate those late in life accumulations under my arms but this pattern actually had to be made smaller, so beware. 

It took extra effort and fabric at the cutting stage to insure that all the prints matched and were symmetrical throughout. 


Conclusion:

I am pleased with the pattern, once again, and the outcome. I love Ikat designs and this project let me express that choice. I highly recommend the pattern but suggest lining it one method or another and making a full facing that goes around the neckline. If I find the right rainwear fabric I may give this a go one more time!


*****************************************

I've had some questions regarding the iron I just purchased. I used it throughout this project and knocked down my ironing pile today as well. I am very pleased with it. It pushes out more steam than any iron I have ever had,no drips. It is a Rowenta "Steamforce" which I got through Amazon. My favorite feature, however, is that skinny little point with the steam holes in it. It is wonderful for ironing seams open effortlessly. No burned fingers! And those are all steam holes, not dimples, unlike my last Rowenta. 

******************************


I often get asked about my little bunny labels. I picked up this roll, half of which has been given away, quite some time ago. I got it at the much missed "Fabric Fix" store for one dollar for the entire roll. I would love to think that one day I will actual run out of little bunny labels. Now that's a sewing fantasy!...................Bunny

Thursday, September 25, 2014

Happy days are here again!

Out with the old:


In with the new:


This is one heavy iron. I like that. It also pushes out some killer steam, more than any I've had before. I think we will be good friends.......Bunny

Monday, September 22, 2014

Mr. Lauren, Please!

This week the Sunday Style magazine in the New York Times was devoted to men's clothing, clothing worn by men with stunning looks and come hither gazes. Hmmmm, this was going to fun to look at. The coveted inside cover and first and second page were plummed up by Armani, beautiful clothing and men. The next two pages were devoted to a Ralph Lauren advertisement. A man about as handsome as handsome can get is in a classic power suit with hands evenly placed on what one would imagine is the board room table. Then it took my breath away.


OK, first, please forgive these pics. If you can get your hands on this Sunday's NYTimes Style magazine, you will have much better photos to see than what I could take here. I took pics of the glossy pages as best possible. While not good, they still make my point so I decided to publish them anyway. Now that the disclaimer is out of the way..............

What's up with this suit? Here's what I see:

* the roll line on the left facing lapel is like, where? The lapel appears to be just one big folded over flap. The right lapel looks fine.

* Is that lumpy fusible in that left lapel? It sure looks like it. It is far more evident in the actual magazine photo.

*The right shoulder appears Ok but that left one ----a little droopy?

* Wrinkles  where the chest shield would/should be?  Maybe that's why the left lapel is folded over so far!

* What do you see? Am I imagining, being too critical of probably my favorite American designer, a man whose clothing I would love to wear every day? What do you think?


Now, if you keep turning pages in this mag dedicated to the peacock in every male you will see Burberry, Gucci, etc...... There garments all fit exquisitely and are beautifully tailored by comparison. Here is some Gucci for you:


See the difference?

And here's a Botega Vanetta coat with gorgeous tailoring.


I think the difference in quality, fit and tailoring is near embarassing, Mr. Lauren. What happened here?  Who had editorial control? And if a little old sewist in the boonies notices these things, is there something deliberately being fed to the readers of Style NYT? I am just so surprised at what I see.

If you continue throughout the magazine it is page after page of exquisitely tailored, beautifully dressed men, none of whom are photographed in less than perfect, albeit photoshopped (?) perfection.  Every designer imaginable is represented. The Lauren suit fell far short. I am disappointed. I love Ralph Lauren's esthetic, his all American signature style. His garments are classy, tasteful and so very American. I even think this power suit is beautiful but the fit and technique are surprising me. Sigh,,,,,,,

Again, these photos were the best of many I took and to really appreciate this try to pick up the Style magazine from Sunday's New York Times. Anxious to hear your opinions.......Bunny

Sunday, September 21, 2014

Simplicity 2153, cuffs and a zip issue

First off, my iron died yesterday. As I was ironing the sleeves water literally poured out of the steam holes and soaked the sleeve and ironing board and my feet. It also stopped heating and I couldn't bring it back. I have had 3 Rowentas over the past 20 years and they alway end with a bang. I have felt they provided me with good service during that time. I liked that they were heavier and therefore did some of the work for me. This is the world of Pinterest, Pattern Review, Amazon and Epinions. Based on a few sewists I respect I have been gunning for the Reliable for some time. But then I read the reviews. The current top of the line Rowenta came out quite a bit ahead so that's what I chose. One click later and it will be here Tuesday morning by noon! Love that Amazon prime! In the meantime I am stopped in my tracks without an iron but did sew on the facings and the sleeves were completed. Here's the end result and how I got there.


I figured out I needed a facing of five inches to make this work and attached that to the sleeve lining with a seam. Stitching followed the lines I had drawn. you can see the front and back below.


When the stitching approached the slit I dialed down the length to 1.5. This fabric is really ravelly. I Fray checked each point on both the facing and ironed dry before cutting. Loved those drops of Fray Check shining in the photo!


The edges were ironed favoring the sleeve side so that when the cuff is rolled up there is a smooth look.


Done!

To finish the sleeve construction I did the Nancy Zieman sleeve technique that you can find on the Tutorial Page. Easy Peasy! The sleeves will then be put in and bound with the Bemberg lining. At this point the iron croaked and I decided to have a beer and call it a day. This morning I dealt with what I consider an issue with the pattern that I would like you to know about.

I remember from the first jacket I made from this pattern that when I got to the point of attaching the collar and facing the result of the junction of the collar, facing, and zip was very messy once sewn and turned to the right side. I had to do some back peddling to make it presentable. 

The pattern has you stitch the separating zipper to the center front seam at the 5/8ths line all the way up and down. Fine. Then it has you butt the collar right up to it. Fine. The facing is placed on top  and stitched all around. Not fine. What this does is cause the zipper to twist over the collar and look totally bad.  I have actually looked at some reviews of this pattern and you can see the issue if you see any closeups. Here's how I handled it this time. If you plan on making this pattern I would definitely keep this info somewhere. 


On each side of the zip I folded back the zip at a 45ยบ angle. With just twisting it to the side it was not easy to get each zipper top matching on each side of the bodice. With this sharp angle I could measure and bend them both back equally. This will now get sewn into the facing seam and here's the results. Hope this helps any who decide to make this jacket.


There are some green arrows showing how the zip would twist over the collar and then back to the facing if done the way the pattern leads you. Hopefully I will have this all ironed nicely for you to see soon. The iron death sure took care of my finishing this today. One of the great things about bound linings is that when you are done, you are done. No making a second garment and putting it inside. Love that.

I think the gremlins are in my house. We are going this afternoon to buy a new stove, dishwasher and hood. Seems they and the iron all decided that living in this house for ten years was enough.......Happy sewing!........Bunny

Thursday, September 18, 2014

What's wrong with this picture?


One of the suggestions on this pattern was to use rivets at the corners of the pockets. I liked that idea and had some nice silver ones. These are flat with concentric engraved circles not visible here. I chose them because I really like the look. Hammer away!


The next morning I went to wear my recently made print jeans and looked at those rivets which I installed after watching a few youtube videos. Have you figured it out yet? I put these in backwards. ugh.....but I did that because I thought the back of the rivet was the "pretty" public side. Clearly there is minimal rivet experience here but I have learned a lesson.  OK, the rivets could have been installed with the little nipple side out but they weren't as shiny or as interesting. So while I made a mistake here, it was that "wild enthusiasm, unencumbered by the thought process" that had me make by decision by the look I liked, not by the "rules". So while my ego has been bruised by my lack of knowledge, I am comfortable with a look I chose from the outset because I just  liked it. Do you really think the rivet police will come after me?

Next snafu was the yoke. It is well installed but not the way I wanted it to be. Again, wild enthusiasm took over. I was doing the burrito technique for the yoke which is in the tutorials. But I topstitched the yoke before closing it up. This meant I didn't have a free seam allowance to connect with the wraparound lining yoke. Whahhhhhh......So I just did the traditional handstitched yoke finishing you see here and all is fine, just not quite what I wanted. I will adjust the tutorial to reflect my stupidity   eagerness.


I am on to the sleeves now, s l o w l y  on to the sleeves. I want them to have a fold back cuff with a slit.  I've adjusted the photo so you can see my markings a bit better. The top line is the hem fold. I added another 3/4 inch for turn options. How deep did I want it to turn? Then the cuff which has a slit in the middle, then the final seam allowance. I haven't cut off the surplus yet. The lining will have a facing that will be two inches wider than the "cuff" space. They will be placed right sides together and stitched on the drawn lines. Fingers crossed. Go away unbridled enthusiasm, go away...........Bunny

Wednesday, September 10, 2014

Challenging Pockets!

What's so challenging about a couple of big ole patch pockets? Matching them the way I wanted to! It was a bear.


First, I deviated from the pattern in that I wanted a slanted cuff on the pocket. I also wanted the pockets on the diagonal, bias pockets, so they would need an on grain lining to keep them from stretching out. Then the cuff needed to be bias as well but in the other direction. If I put it all going in the same direction you won't notice the cuff. So the cuff had to go the other way, That was the rub!

This is not as easy as it sounds. It took a lot of head scratching, flipping of fabric and pattern pieces to finally get it right. There are two pockets and they mirror image their bias design. I need to line the pocket and for the top 2 1/2 inches there would be ikat fabric that when folded down would go in the opposite and bias direction of the pocket, basically a faced edge to the lining. Then I had to do the reverse for the cuff on the other side. Confused?  Trust me, it took many tries to finally get it right. If anyone ever tries this the trick is to put wrong sides together and make sure the pattern flows continuously. You can see that with the green arrow above. If I cut that piece in this direction, it will work. I had to cut them wrong side up to make sure I got it right. I'm exhausted already.

Here the pieces are trimmed for a trial run and ready to get their lining. Don't want to mix anything up!

I got them sewn together tonight and they are ready for topstitching. I need to sample that out first. I've decided to topstitch in the darkest shade of the blue,  a trick I learned from smocking. An expert told me to pick out either the darkest color in the print or the lightest color when choosing smocking thread colors. We'll see how that works with this jacket! I may also use that triple stitch once again. I really like the look and this jacket could use some heavy topstitching to casual it up. So next stop is samples and then get those pockets on the front of the jacket. Till then..........    Bunny

******************************************


We woke up to this the other morning. Seems Rocky Raccoon thought the pickings inside our house were even better than what was outside and literally chewed through the screen and weather stripping. Nasty, huh? Do you know how many times on a hot summer day I leave this window open when I am not in this part of the house or out busy in the garden? Not any more!  I would have died if I woke up to a raccoon in the house in the middle of the night! At this point hubby and his Have a Heart trap have dealt with the issue and now we just need the window fixed! Rocky can go chew through someone else's kitchen window! Oh, he climbed up the porch rails, onto the grill and over to the window..,,life in the boonies!.....Bunny

Tuesday, September 9, 2014

I'm a Noob and I so get it!


Off and on over the years I have dabbled in jewelry making. I love playing with the colors and textures and working on a small scale item. My number one passion has always been  sewing. But I have decided it would good to stretch my creative wings and really learn how to make jewelry and do it right. I've been concentrating on this a lot lately, investigating classes, forums, youtube, vendors, etc. and as I do I keep seeing how this applies to sewing and more specifically, being a new sewist. It's been a long time since I was a new sewist but I think there are some universal truths that travel across any creative endeavor. I would love to share a few of my observations with you.

*1      I am overwhelmed. There are so many beads and wires and findings and on an on. How does one know even where to start? Do I want to learn wire work, loom beading, pearl knotting? Yikes!

For a beginner sewist it must be the same. All those patterns, fabrics, threads, notions, just so so so much stuff to it all. Where does a person who is just starting to sew start? Buy a pattern and just go for it, follow sewing blogs for inspiration, look for classes?  My suggestion would be to start simple. I should follow this advice with the jewelry, but will I?

*2      I have unbridled enthusiasm. I can't wait to learn more, get better at it and just attack the whole endeavor with all I've got. 

As a beginner sewist, there was no stopping me. I couldn't wait to get to the fabric store and pour over pattern books, drape fabrics over my fist and just fantasize away on the upcoming garment I would make. Today the internet magnifies this even more with such a marketplace online it's incredible. And there are many to share sewing enthusiasm with through forums and blogs. Wow! See Number One. It can be overwhelming.

*3     I want to go straight to the difficult stuff despite my having no clue. I see amazing hand made jewelry on Pinterest. I can make those too, right?

How many times have you seen posts on Pattern Review where someone says they have never made a dress but have decided to make their sister's wedding gown? Oh, and it's a knockoff of a 20,000.00 Monique Lehuillier model. Same deal! Wild enthusiasm can do that to you!

#4     I don't know what I don't know. I think the three previous bullet points  prove that. 

The same faces any new sewist today. Their moms and grandmothers are not teaching them to sew. Neither is the educational system which taught everyone at one time what a quality garment was in Home Ec class. But this not knowing what you don't know has a good side for newbies. They will try anything and that's great and how we learn. And they may come up with new ways of doing old things. I love that. 

#5      I am amazed at all the opportunity there is out there to learn jewelry making. Craftsy classes, the local artist's guild, vendor's tutorials. 

Craftsy is a great opportunity for the new sewist. Various teachers have various skills but if you start listening to different teachers with different skill sets, you will still learn and it won't be long before you know who is great at teaching  quality sewing. Newbies need to also look locally for classes, dressmakers or tailors to help with slopers or measuring, guilds for friendship and encouragement. There are lots of options. It's just a matter of being open to those who have come before. I have found a local fiber artist to teach me about dyeing, shibori, etc. Seek and ye shall find!

#6     Jewelry blogs and forums are just like sewing blogs and  forums. You can read and lurk or you can jump right in. Some people know lots and inspire. Some don't. 

Newbie sewists have these options open to them as well. I would love to see a forum for really new sewists, in particular. Wouldn't that be great? Newbie sewists deserve the depth of convo and learning that takes place on forums. It will only enhance their total sewing experience. And you can make great, real friends! ETA: There are countless Facebook sewing groups. Those are good but sharing one liners is not what I am talking about here. On forums you can have in depth discussions, varied opinions and much learning and friendship takes place as you get to know regular posters. Stitchers Guild and Pattern Review are two great ones but there are others. 

#7     Jewelry making has its tools, jargon and types, all of which are very new to me. I have ordered so many books through our interlibrary loan. You can't imagine! I pour over them all the time lately and of course most of it is still foreign to me. 

Sewing also has it's jargon, tools and specialties. It is not easy to figure it all out as a newbie. And sometimes terms can have more than one meaning, just like in my last post. The best way to get a handle on all the "biz" is to just stick with it. The third or fourth sewing book will be a lot more familiar than the first one which may seem to be written in a foreign language. The same could be applied to following patterns. Look to forums and blogs for recommendations on good sewing books. There is a plethora of newbie books out there, but on more than one forum I have seen the request for the "next level" sewing book. Reader's Digest or Singer Sewing Library would be great. Anyone know of good beading books?


So right now I am a newbie beader, I guess you could say. And it has come with all it's frustration, excitement and creative inspiration. It makes me sympathize sooo much with those of you who are just starting out with your passion for sewing. Keep at it. The more you make the better you will get. That thought gets me through some of the more sloppy things I have made. I am going to try to teach myself as much as I can through youtube, books, classes, yada yada.... A new sewist can easily do the same as information is so readily available to day. 

I just want you to know that I understand what it is like to be new at something creative. I'm a pretty old hand at sewing at this point and offer my experience and help to any newbie out there. Now can anyone answer a few beading questions for me?...Bunny


Sunday, September 7, 2014

Flat lining on Simp 2153

Its great to get back to sewing, finally! It's been a whirlwind past few weeks with travels to NH to visit grandchildren and their families and spend some quality time. I hope you all have had the same before the start of school complicates schedules and visiting.

I've started, at last, on the Ikat jacket, Simplicity 2153. This is the jacket pattern I used for the Threads Fall Jacket challenge. This latest version was meant to be a summer garment and it will be, next year! But if you have been following me for a while, you know I only do one machine garment at a time. The jacket will get finished before I start any further sewing and I am enjoying the process a lot as my tweaks make it a bit more challenging.

One of the great things about blogging is that you can go back and reread about one's earlier iterations. It was a big help before I actually started cutting out this version. Going "back" ended up providing me with a bit of controversy, something you know I don't shy away from, and I will bring that up in a bit. First....

I flatlined the bodice as I did in the Fall jacket. The lining this time is a Bemberg rayon. It does show through the pattern of the fashion fabric but this is a summer jacket, not something I want a thicker lining in so I am fine with the show through.


I started by cutting the vertical bodice seams on the lining fabric  1/2 inch wider than the public fabric on each side seam, so one inch total added to the back bodice. I did the same to the front bodice pieces, side seams only, as the zipper/facing will hide the CF seam. All other non vertical seams on the lining were cut the same as the fashion fabric.


With right sides together, the fashion fabric and lining vertical seams were sewn together for each piece. A 1/4 inch SA is used. The center front edge of the bodice was not sewn. Remember the zipper? Once sewn together, the small SA was trimmed back to an 1/8th of an inch. Measurements are important here.  We started with a 5/8 SA. We sewed it just now with a 1/4 inch SA. Now we are trimming off 1/8th of an inch of the SA. This leaves a SA of 1/8th inch. You still have a half inch of SA untouched. That means the seam allowance for these seams is ONE HALF INCH, not 5/8ths, these seams only.


That trimmed SA is now pressed as sewn, then the lining is pressed towards the lining. It is then wrapped around the raw edge of the seam to the back of the fabric and pinned so a slightly larger than 1/8th inch seam allowance is showing. Pin this down nice and snug. Now I go to the machine and stitch in the ditch with an edge stitching foot. It has a blade that runs right in the ditch and is really great for this purpose. Sometimes I will topstitch instead of ditch stitch. Its up to you. But make sure you stitch.

When I started this project I took the lazy route and just Googled flat lining. I expected the Threads article where I learned this technique to come up and it was first in the lineup. After that was my tutorial on flat lining which you can easily find on the tutorial page above. But after that were a few more interesting posts on flat lining from other blogs. One, from a more newbie sewing blog, said you didn't need to bother with the ditch stitching/topstitching of the seam. Well, I am here to tell you that you do. Without the ditch stitching the binding gets all ripply, particularly after the first wash. Now you may say that it doesn't matter and no one will see that. This is a technique to add beauty to your finished inside of the garment while protecting the SAs from unravelling. It takes a fair amount of extra time. If extra effort is being taken to beautify the inside of the garment, I don't want it to be all wrinkled and nasty after washing. My vote goes with following the entire method for the best results.

The next blogpost I found interesting was in a blog by an historical seamstress. It was her tutorial on flat lining a gown she was currently making. I have a lot of respect for these sewists who make clothing for re-enactments, historical events, etc. They  go to a great deal of effort to used the techniques of the time of their portrayal and that takes a lot of research and effort. I haven't met one yet who wasn't trying their best to do quality sewing which  they took very seriously. While I was studying her tutorial, it became evident that what she was calling flat lining was nothing like the process described above. It was what mosts sewists I know would call underlining, treating both layers of the garment as one. Seams were not bound but all pieces were "underlined", my word for what she calls flat lining. Since this sewist seamed to really have her sewing chops, I felt I needed to do a bit more research. And she is right! I came across some information about civil war garments and what I call underlining clearly called flat lining. Moral of the story, words and sayings do change meaning over time and because of that often a word can have more than one meaning. I find this fascinating bit of trivia and it's really interesting how this term changed.

Not to long ago, Kenneth King, if I am not mistaken, had an article in Threads about the differences in the terms lining, underlining, and interlining.If memory serves me right, he made the point that these terms can be and are often used interchangeably, again, that changing meaning!  After waxing poetically over these terms I am wondering if maybe flatlining as I use it should be called something else. The term "bound lining" hit me during my evening table clearing. What do you think? I'm ready to change the name as it seams more specific to the technique. Opinions??????

******************************************
 We have only one thrift store close to home up here and I swear someone out there beats me to everything. I never find anything useable. That was until last week. There were clothes outside with signs that said "Free". Finally I scored! This garment has lots of wooly type lace that I just fell in love, very Alabama Chanin, don't you think? I also scored some sweaters to felt in really nice colors, not the usual burgundy and grey. I will have to let this wooly lace age a bit before I know what to do with it but I do love it. It may be my first winter garment!....Bunny

Had to Refurbish This One!

    About  6 or 7 years ago , during the dawn of the Zipper Trend,  I bought one of my rare retail items. It was a blush pink and black bord...