Sewing Vloggers

Monday, September 30, 2013

Chanel Jumper??? Simp 1723


Sophie's jumper, Simplicity  1723, is a done deal! I put a bit of extra effort into this child's garment but that boucle made me do it!

Pattern: Simplicity 1723, jumper, jacket, skirt and headband, all with a slight nod to Coco Chanel. Amazing how her classic designs filter down to children even all these years later. It was not difficult.It does not require a lining but I did one. I recommend. My grandaughter loves any sort of jumper or long top to wear with her tees and leggings. 

Fabric:   It is made with an acrylic and cotton boucle and I pray it doesn't pill. It hasn't yet so that bodes well. I have machine washed and dried all fabrics used so expect no probs other than a lack of desire to press clothing on the part of my daughter. She will  more than likely send it to the cleaners. That's her MO for anything not knit. 

The lining fabric is a 100% poly, a charmeuse wannabe. It was "springy" as many older polies are. It was given to me by a friend when she cleaned out her stash. 

I used a poly grosgrain ribbon for the belt and some little lace flowers picked up at Fabric Place in Mass. I found the garment a bit too serious for an eight year old and had to fun it up a bit. Sophie loves polka dots.

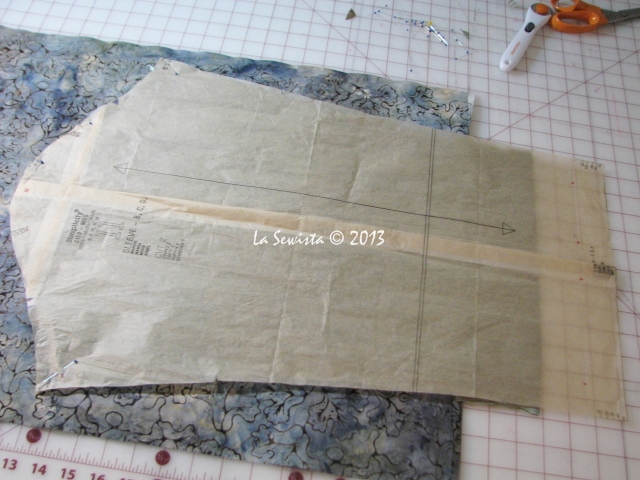
Construction: After my last positive experience I decided to flatline the jumper much as I did my crinkle jacket.  It took a lot of "pre-sewing" but once done the process of putting the jumper together whipped right along. The facings, hem, and waistline are bound with the same lining fabric. The boucle really needed the structure of the lining and bound seams to keep it from unravelling, something it wanted to do with a vengeance.

If I had to do it again I would not face the jumper with self fabric. I would use a thin lining instead. It is far too bulky in the button area for my taste but I will just move on from that observation. It won't bug anyone but me. I did not make real buttonholes and just stitched the straps shut with the buttons. The zipper is plenty long so I don't think Sophie will have a problem getting it on. I used an invisible zip and machined stitched the facing ends into the zip, no handwork.
Facings were understitched as much as possible and the edges bound with bias lining fabric. I used my clapper and tons of steam to get those edges as flat as I could.

As far as fit, I did have to alter the pattern. Sophie is very tall and slender so this was made in a size 8 with an inch added to the bodice and another to the skirt. I think dresses look cutest on little girls when the waistline is a bit elevated and this does that  on her. Her back waist measurement is 2 inches longer than the pattern measurements and I only added that one. 

All in all, this pattern is simple, cute and could be whipped right out if you don't  flatline, line or bind those seams. This would be great for the serger. But my fabric required the additional fuss. I must admit, it does feel lush and yummy in the way a Chanel jacket does. Maybe next time I would do an edge to edge lining as she did. I hope Sophie likes it. She did pick out the pattern and pink fabric.

********************************************************************************
I just have to comment that we have had the most incredible Indian Summer weather. It has been in the high seventies for days with clear blue skies and leaves on the trees flaming with color. Will winter want payback?......Bunny

ETA: Why does my text publish in different sizes when I don't change the size?I've notice this on only certain computers, not all. Are you seeing my text in different sizes, other than the headings? Thanks...Bunny

Sunday, September 22, 2013

Simplicity 1723 Begins!

Any notions I had about whipping out a simple little jumper for Sophie have left the building. First the fabric: It's acrylic and cotton pink boucle, cute, and it FRAYS! Oy, does it fray! That was dealt with  as you'c expect. It stretches out. I ended up taping the neckline and armholes. I had to cut the tape to fit  the pattern and steam the fabric back into the proper length and stay stitch the tape on. The tape is selvedge from other projects that I save up in a jar.

I also chose to flatline this garment, so that all took time. My entire sewing yesterday was all prepping the pattern pieces before actually starting to make darts and stitching the jumper together. Now that all of that is done I can just put the thing together today. This will have a facing because of the shoulder tabs and that will be bound as well as the waistline seam. I am also putting in an invisible zip so the sequence of construction in the pattern directions will not work but that's OK.  The flatlining and topstitching all those bound seams should really strengthen the boucle weave and prevent seams from popping apart. Sophie is an active little girl who loves to dress up, a girl after my own heart, and I know  she will love this.
***************************

I have just discovered ground cherries at our Amish neighbor's farm stand. They are wonderful and today I hope to make a coffee cake with them. I am going to get lots more and freeze them up for the winter. Plan right now is to make a ground cherry pie at Thanksgiving. We will be having a houseful this year and I want to have a memorable feast. Have you ever cooked ground cherries?....Bunny

Wednesday, September 18, 2013

Assessment

I kept wanting to call this post "Re-assesment" but I never assessed to begin with so how can I "re" the assessing I never did? So instead  this will be an assessment of my current state of sewing affairs. Many bloggers will start the new year with a plan for the year and goals to be reached. My goal setting is usually by the day or week and a year ahead is a bit too nebulous for me. Of course in my mind there is a horde of designs with an even bigger horde of fabric to go with them. What is it about "the road to hell is paved with good intentions"? My intentions are good but I truly doubt that will show me the way to Hades. Instead they will either get made or they won't

That being said, this time of year does make me focus and assess. The holidays are looming. What festivities will I attend? The cold weather is licking at our ears right now with the serious white stuff just around the corner. That requires winter clothes. My grandchildren and other family members all have their birthdays in November and December. That needs gifts and the most appreciated are the ones I make. I am lucky like that. It is just a time frought with lots of sewing needs. And you know what? That's OK. I just have to decide what get's priority. Here are a few things  running around in my mind.

These are wolves howling at the moon. I just got this from E-Quilter and it is gorgeous heavy flannel like I get on the Native American Reservation near here but right now I don't have time to go visit. My little grandson asked me the other day, "Bunbun, what are you making for me now?" emphasis being on the "now". My heart went pitter pat as the answer was nothing. My reply to him was "what would you like me to make?"  Without hesitation he answered, "Jammies." I can do that. I'll use my tried and true OOP Simplicity 2771. It's been featured many times in the blog, the last being these jammie:
 And then there is Sophie. She told me she likes this jumper and would love it in pink so pink boucle it is. I did manage to get it cut out this weekend using Simp 1723. After the last project I have decided to flat line this so it should go together nicely. I just have to think of some waistline embellishment.

Then there is my little Carly. She desperately needs a double doll carrier for her American Girls dolls. Doesn't every little girl? Here are the fabric choices for that. Now to just find that pattern which always seems to disappear. It doesn't actually disappear. It gets misfiled as there are other items on the pattern besides the doll carrier and the carrier isn't real evident from the pattern picture. This will require some digging. I always make things for Carly that lean toward turquoise like her big beautiful eyes. These are my choices:
Are you seeing a trend here? But where is there something for Bunbun?  Oh, there is. Maybe not lots but more of Big projects like my winter coat. I won't show you that fabric as it is a black cashmere/wool blend and yummy but still just black. I will use the very simple Butterick 5960 after debating over many many patterns the past year. Once I saw this one it was final.
This pattern is just simple enough to give me a few seasons wear, with or without the belt. I'll do a Kasha lining and some other embellishment.
I also managed to recently score some really lovely rayon crepe for a blouse. It is yummy and has such a gorgeous drape. Not sure what the pattern will be but it will be "flowy". I'm still searching. It washed and dried beautifully.

And then there were these two yummy fabrics, both velvets. The first is a cotton velveteen and just gorgeous. It begs a simple design and I am still not sure what that is yet. By the way, any and all suggestions for garments or actual patterns will be taken seriously and appreciated. This first velvet is languishing since it's purchase last year. It just never got made into anything. My husband's health issues started last February and that put the kaboshky on a lot of the projects I planned for last winter/spring. He is doing very well now, thank you, after 7 months of treatment so now we can focus on other things which for me is back to sewing.
And the last piece of fabric here I think is utterly fabulous. Looks like moguls on a black diamond ski trail, right? It is a sculpted 100% rayon velvet and it just blows me away every time I look at it. I just know it would be great in one of those voluminous rounded shoulder jackets/coats you see on the runways right now. But on moi? I don't think so. Let's just say the word is "mushroom".  So I am asking you, dear readers for your ideas for this yummy fabric. What would you make? Remember, I am five feet tall so nothing too overwhelming. Part of me wants to line it and put it on my bed as a throw and the other part wants a really cool jacket. Here it is:

One thought I had was to do some sort of surface dyeing on it. Your ideas????

Isn't this beautiful? My first hibiscus ever is giving up it's last gasp of summer. So lovely.

Thanks to everyone for your wonderful thoughts and comments on the Crinkle Jacket. It was a really fun project to make. Kudos to my hubby for the great photos. Mine with the self timer were really sad. He is much easier to smile for than the side of the house. Again, your thoughts and encouragement are always treasured and appreciated.......Bunny

Sunday, September 15, 2013

The Deets on Simplicity 2153


Love this jacket!  Isn't it just perfect for a slightly cool Adirondack fall day? Here's all the deets:

Pattern:  Simplicity 2153, a basic anorak with collar and sleeve variations.I found the final results pleasing but it took a couple of muslins to get the fit right. The sleeves fit the armhole perfectly both before and after my alterations so the draft is essentially there. But the armscye area was very weird looking and until I followed my gut (you'd think I'd learn to do that right off at this point) and scooped out the front of the sleeve it just did not work. This pattern was petited, the shoulders narrowed, the sleeves shortened a lot and it had a small FBA to elminate some wrinkles. I didn't do my normal FBA as I felt the 40 /2 inches of bust was enough. The small FBA definitely helped. I also took in the side seam from the armpit to the waist a full inch on each side. So I guess that removed some of that ease. Lots of alterations but in the end I think I got it. It is a jacket and therefore will have ease and I think it is fine at this point. Just watch out for that armscye area if you make this.

I did not follow the sequence of construction in the pattern. The techniques I used required things to be done differently and needed some head time before moving from one process to the next. I did not use the epaulettes in the pattern as I thought that was too much and wanted the crinkle to be the star.

Fabric: The fashion fabric is a 100% poly crinkle. It was washed and dried before using and came out of the dryer with all wrinkles and crinkles in tact. Be careful with an iron as that can remove the wrinkles but they came back with a bit of water. The fabric is a cross woven with weft a copper-ish color and the warp a light turquoise blue. It has beautiful selvedges which I kept. When two colors are cross woven like that you get an irridescence to the fabric which is lovely. You will often see silk dupioni like this. I found this fabric in the clearance section at Joann's and got it for 2.50 a yard. I had been eying it a long time but didn't know what to make till I decided after trying on a six hundred dollar jacket in Lake Placid that a similar jacket would be just the ticket.

The lining is 100% cotton batik. It is fine and tightly woven and is easy to slip on and off over clothes. It made a great lining. It was the part of the 4 yard piece meant for Marcy Tilton's mullet dress that I decided I didn't want to make friends with.  Adhering to my oft repeated philosophy of "Just Cut It", I did, and am glad. It worked with the crinkle really well and was a delight to sew. Lets just say that was six times the cost of the crinkle.


Construction: This jacket is totally enclosed and finished on the inside. This happened by using a technique called "flat lining" which you can read about here as well as in tutes in the right sidebar. Sometimes when we don't use a technique for a while we forget how great it can be. This was just that sort of situtation. My next project will be flat lined as well. It just provides such a lovely finish.

The yoke was constructed "burrito" style which you can see here. If you've ever made a pillowcase you have probably used this method. I added a faux leather label to the facing which I painted with my initials and date, gold sharpie paint marker, not a regular marker. I love their "paint" markers. 

The sleeves used a Nancy Zieman technique which also totally finished them off and you can learn about that in the link. It is really easy. Then armscye ends up being bound with bias and nicely finished, so not a raw edge in sight on this project!

One of the fun things to do was decide how to deal with the cord going through the neckline and the waist. Did I even want to use cord? Or did I want to finger knit some sort of fiber or even use a ribbon? I found just the right color cord right when I was about to give up on the idea. Walmart to the rescue. They also had the bronze colored grommets which I couldn't find at JA's. I forget where I got the beads I used but they are cheapy "Pandora" knockoffs that I've seen in numerous craft departments. They worked great. I soaked the cord with  Fray check for about an inch and a half, put the bead on, tied the knot on the wet area and when dry cut the cord. This cord frays like an old sweater hole so be aware.
There was a lot of topstitching on this project. For the entire project I used a new size 12 Microtex needle, my go to. It worked just fine. The zip is a separating jacket zipper from Coats. I looked into ordering but felt the color of this worked perfectly. The facing is interfaced and you can see that it almost  removed the crinkle from the fabric but that was fine for the inside. Here you can see what the jacket looks like zipped up.
Well, I have worn this once already, to town to do my shopping. It feels wonderful, the way any well fitting and constructed garment does. There is just no comparison in  retail I can afford but it sure was fun trying on that six hundred dollar version! I highly recommend this pattern. Get past the arm fit and you have a winner. I am already thinking of making a denim or twill version for spring. As always, more sewing to come!.....Bunny

Monday, September 9, 2013

The Zieman Sleeve on Simplicity 2153

We are almost at the finish line. It's a good thing. We had frost last night and even colder tonight so my fall jacket is much needed. Tomorrow we will be in the low 80s but tonite it's frost. Such is life in the Adirondacks!

Nancy Zieman is my heroine. I have said it many times. I used to tape every program and watch and rewatch them to the point of happy brainwashing. This woman has taught me so much that I use in all my sewing from fit to zippers and back. This jacket I am working on right now will use a method I  learned from her program at least 15 years ago, maybe more. Her techniques are timeless and they save time and effort. On the crinkled jacket I will be using her quickie lined sleeve technique. I really wanted all my seams either bound or hidden. With this
technique they will be and once done,  the inside of the jacket will be totally and cleanly finished. This is very easy. I did it just a  bit differently because I wanted to be able to roll up the sleeve a bit. This meant I I needed a really deep hem and a longer sleeve. At this point the fashion fabric sleeve is cut out with a 3 inch hem. This means once folded I will have a one and a half inch cuff folded up. So the fashion fabric needs to be cut twice the length of the foldup. Hope that's clear.  Now we need to cut the lining. To do this I first cut a block of fabric out of the lining making sure it was on grain. The hem edge of the FFS (fashion fabric sleeve) is pinned to the crossgrain of the block  and a seam is stitched.

I then marked the fold of the hem on the RS (right side) with a frixion marker. This hem fold was pressed in and the heat of the iron makes the pen marks disappear.

The seam is ironed toward the sleeve not the hem. 
Flip the fabrics over. Your FF, which is already cut into a sleeve, will be facing up. Wrongs side are facing.  Pin the sleeve pattern back onto the cut FFsleeve including the lining fabric. The tissue on the right shows how my extra sleeve length has been folded up and seamed to the lining block. Once pinned the lining is cut out to match the FF sleeve pattern piece.

Once cut and flipped over this is what you will see:
Take the pattern tissue off and open out the sleeve. Pin the underarm seams together and stitch the full length.  Press your seams flat then open over a seam stick or roll.


Once done put the lining sleeve on your arm and pull the FFS over it. Match seams and pin around the armscye edges. Stay stitch around the entire armscye seam on the sleeve. Now you are ready to install this into the jacket. The pattern , Simp 2153, has you stitch the sleeve in flat but that would leave my underarm seam raw or needing to be bound .. Instead I stitched up the side seam which also gave me a chance to check the fit (nice) and installed the sleeve into the armscye in the traditional manner, in the round
.Once the sleeves were installed the armscye seam was bound with bias binding from the lining fabric. Sleeves are done and all that is left now is to put some beads on the cord and string this baby up and then a fashion shoot! We'll see what the weather holds tomorrow! ....Bunny

Friday, September 6, 2013

The Business of Fast Fashion

This is a short video about "Fast Fashion" . This was sent to me by Zoe Gray, a researcher for Online MBA , a site that provides education and industry insights to current and prospective MBA students. I just love that today's MBAs are getting hooked into this reality. You all know how I feel about fast fashion. You know how It has dumbed down the clothing design industry from the very top on down. And let's not forget how it ruins the environment. Remember all those workers who died in the fire? This subject is close to my heart. But the biggest reason I am so on top of this subject is that we sewists can make a huge difference here. We know quality in clothing. We know what it is like to have something well made, that fits and flatters and that will be wearable for years. We sew those things. I would love to know you comments regarding the very short video. I think it is well done and gets Elizabeth Cline's gotta read "Overdressed" concepts down to a very short screening. Zoe, our researcher here, would love to know your thoughts as well, so chime in, whatever they may be. Again, I am thrilled that this is part of an MBA program.Thanks for your thoughts. ...Bunny

Tuesday, September 3, 2013

The Burrito Yoke

Once my bodice was flatlined it was time to install the zipper and pockets. Done and really quite quickly on the zip. Before I can put in the casing for the waist drawstring the side seams need to be sewn up and before I can do that the yoke needs to be sewn. I could have just seamed it to the bodice front and back and then do a Hong Kong seam but I really didn't want that cross line of the bound seams. I decided on the "burrito" method for the yoke. I have often used this concept for collar stands and occasionally for a yoke or two over time. Can I remember how? It all came back pretty quickly.

This pattern, Simp 2153, has you cut one fashion fabric yoke and just stitch it to the jacket. NO, No,no...I cut one lining piece and one public fabric piece, aka, fashion fabric. This yoke will be faced in lining fabric.
 

A sandwich was made with the right side of the FF (fashion fabric) back bodice and FF yoke facing each other. On top of this went the lining yoke facing the lining, right sides together, four layers here total. This is stitched across the horizontal yoke back seam, graded,and pressed toward the yoke. Now comes the burrito part.  Lay the front bodices face up. On top lay the back bodice face down. Pin the two FF front yoke seams together as you see in the pic above. I stuck the pattern directions behind the lining yoke as it gets lost with that print. Stitch those two seams. Press toward the  yoke.
ETA, 9/18/14:  Do not topstitch the front yokes yet. Doing that will not allow you to use the seam allowance to continue this process. See this:yoke alert!


Flip the lining yoke back down and start rolling up the bodice until you get to the yoke seam as shown above. Simple enough, right?  The pic below is what you should end up with if the above pic is turned over. Nothing has been changed, just  the pic taken from a different side of the roll.


Bring the back lining yoke up to the seam you stitched in the very first picture sewn here, the front yoke seam of just the fashion fabric.

These seams shown above get stitched together. The jacket is all rolled up inside,just like a burrito. OK, so it's a cliche, but that's what Margaret Islander calls it in her DVDs.  Here is a pic of it all pinned and ready to stitch. I bet she used pins for this part. (Margaret I. was famous for sewing without pins.)
Once your burrito is all stitched up at the front yoke seams, grade the seams. I like to use pinking shears for this. Then, making sure all the pins are out, pull the roll up jacket out of the yoke. It really will come out and it really will be clean finished inside with no SAs showing. Give it a little press along the front yoke seams and topstitch. TaDah!


Next, those crazy sleeves!...Bunny


Sunday, September 1, 2013

Flat Lining Simp 2153

When I decided to do this pattern I knew there was no lining. Did I want to do a bagged lining, a hand stitched lining, or no lining and Hong Kong seams? After thinking it over a bit I reached back into my tool box and decided to flat line the garment. This is a technique, one of many, that I learned from Threads magazine probably 15 years ago or so. I always love the result but it isn't proper for every pattern. Here's a basic explanation. 

Doing this jacket with the techniques I will show you as I go along is quite different from the pattern directions and has required a different sequence of tasks. For this pattern I will have a bound facing made of the fashion fabric. The facing provided in the pattern only went to natural shoulder seam area which landed it in the middle of the yoke shoulder. There was no back facing. I folded back the front facing to meet the yoke seam in front and then made a facing from the yoke pattern so now I will have a facing all around, much preferred and necessary with the flat lining treatment.


Once the facings were cut the public fashion fabric is cut out. The lining fabric  for the bodice is then cut using the same pattern but each vertical seam that will be enclosed will be cut one half inch wider than the public fabric. Flat lining is done on vertical seams only. As we go along you will see that I have handled the yoke and sleeves differently. What you see above is the back bodice lining, no yoke yet, placed on the fold as required and the vertical side seam only is cut one half inch wider. I cannot tell you how many times over the years I just subconsciously started cutting out the lining exactly like the bodice so pay really close attention and be present in this moment of cutting. One way not to forget is to run a line of pins through the extra half inch before cutting so you don't make that mistake like I have done. I did it this time but was able to use the wrong cut piece for the yoke and pockets, no wasteno problem. I am not always so lucky. The front bodice pieces for the lining were also cut with half inch larger side seams only. The CF edges will be enclosed in the facing so they do not change.  Below you see the back bodice.


The bodice lining and the fashion fabric are placed right sides together. I like to do one seam at a time for ironing ease but you can do both sides at once if you like. Pin the side seam edges together. This will leave you with a mismatched looking bodice with one piece larger than the other. Just ignore that. With this wrinkly fabric pinning was really important.  Stitch the side seam with a 1/4 inch seam. Press as sewn. I now  like to shave off between 1/16th and 1/8th with my rotary cutter. This makes up for the turn of cloth when you do the next step. Press your seam toward the lining. Then wrap the lining around the seam a hair under a 1/4 inch and press and pin. Now let's get to the presser foot.
This technique is helped greatly by a 1/4 inch foot and an edge stitching foot, the one with the blade in the middle. You can do this fine without them but they will give you a bit more accuracy. 
Here you have a good pic of the lining fabric wrapped and pressed over the seam allowance. Now you have a decision to make, either one is no better than the other, just personal preference. You need to decide if you want to stitch your wrapped seam allowance "in the ditch" or topstitch. For this garment I went with the topstitching, clicking two times to the right of center on my Pfaff. The blade runs down the edge of the bound SA and the stitching is a tad to the right.Before actually stitching I did lay my lined bodice on the pattern tissue to check fit. It came out perfect. You haven't changed the width of the seam allowance. You've only wrapped and bound it. On a bulkier fabric half inch seams may be required instead o 5/8ths. It is important to check your garment against the pattern pieces before you stitch any seams together so the fit is maintained. Measure twice, sew once! Can you also see how critical it is to get a good fit on your pattern before starting? That really should be worked out before attempting this technique as there is little opportunity to adjust for fit with this method, some but not much. 
Proceed with this wrapping and stitching until all your vertical seams are sewn. With this pattern that is only the side seams. All other vertical seams will be enclosed with the facing. Once the bodice pieces are flat lined you proceed like any underlined garment. Except.... the yoke will be done a bit differently and more on that in the next post. I am also going to add the zipper in the front bodice before it is connected to the yoke. It's just easier that way but a different sequence than the pattern instructions give. Also coming are the sleeves where I use a Nancy Zieman technique from her early days of TV and one that I have used many times. More lata'....Ooo..I also have a flat lining tute for pants over in the side bar.
*********************************************


Today most of the available sewing time was spent working on the pockets. I could not find tiny rivets to put in the corners so did my usual triangle treatment with a tiny zigzag across the top. .....Bunny


Had to Refurbish This One!

    About  6 or 7 years ago , during the dawn of the Zipper Trend,  I bought one of my rare retail items. It was a blush pink and black bord...