Sewing Vloggers

Tuesday, December 29, 2009

Lots of this and that and even some Chanel!

I can't hold back, so why not first the Chanel?

Over the holiday season this little blog welcomed it's 100th follower and then some. To celebrate I would like to give away this charming paper doll book of Chanel designs by Tom Tierney. It is on v. heavy glossy paper. The designs are fabulous. If you are interested, first, a big welcome to La Sewista. Then please leave a comment with where you are from, ie, Karen, Los Angeles, or just a state or region. I will let this run till the weekend and then Random.org a winner. I so appreciate all of you visiting. If you are not a follower, sign up and get in the running for this sweet little book.

**************************************************************************************


I am nearly done the smocking on Sophie's Cranberry dress. The design requires two rows of double featherstitching. I have worked this stitch before but only on flat fabrics. On a pleated print it is very difficult to gauge the width required for each stitch. I decided to help this along by lining up 1/4 inch masking tape above and below the area for the featherstitching.  Now my eyes can easily gauge the width needed for each stitch.
************************************************************************************
MAGAZINES, AH, THE MAGAZINES!
Yesterday I received in the mail my Sew Beautiful and the latest Burda.


 First, the SB: People seem to be quite opinionated about SB lately. Personally, I think it has become a shill for  Martha Pullen's  machine embroidery, a far stretch from the heirloom sewing inspiration it used to provide. I guess that is Martha's prerogative. The Christmas issue was close to tossable and I doubted I would renew. That has all changed with this issue. The exquisite cover graces a fabulous issue. The theme of ribbons was on every page with so much beauty to inspire. I am talking using ribbons in very unique ways, visits to ribbon experts, and so much more. This is what I call a real "cup of tea" issue, the kind you sit and savor in private and dream of what you can do. Congratulations to SB on this wonderful effort. If you continue with this quality they will be standing in line to subscribe.

Then there was Burda : If there is an editor or photographer out there who thinks the photos in this issue (other than the snow pics) show me a garment I would like to sew, fugetabotit. It all looks like a mass of bunched up fabric on the human body. That would be fine if that were the intended design, but many of these garments have details. And the white gauze on the black wool tights, yuk. Thank goodness for the technical drawings!
Does anyone really thing those pants that end below the calf and have pleats out near the side seams are flattering? I could go on and on. I will just leave it to all of you to make your own judgments. The blouse I feel like currently making will certainly come from an older issue or the Big Four. One great garment, IMO, that leather number with the studs on the flaps. Yummy! JMHO.
************************************************************************************

I hope you all are having a great holiday season. The New Year is now upon us, always a time for reflection. I am going to keep it simple and just sew as much as I can for as many as I can in the next year. I also hope to share it all with all of you. Happy New Year and the happiest of designing and sewing in 2010! ....bunny

ETA: Cutoff time for the giveaway will be 3:00 this afternoon, January 2.2009. Don't miss the fun!

Thursday, December 24, 2009

Merry Christmas to All!

Just a stop in this hurried season to take a moment to wish all my blogging friends a wonderful Christmas and a prosperous New Year. I hope you are all able to spend the holiday with those you hold most dear. As far as prosperity in the New Year, can it get any worse? So I know it will be better for all next year.

I have been smocking away on Sophie's dress and spending Q-time with family and friends. I will leave you with a picture of Carly in her holiday dress, standing next to her crib.

Merry Christmas


Friday, December 11, 2009

It's beginning to look a lot like Chrismas!

Thank you to all  who left such sweet comments on Carly's coat. I really appreciate all of your words and look forward to reading them every day.  While I think I would blog about sewing if no one ever found me, your following has made this experience such a treat. I have learned so much from all of you and hope I can do the same in some small way. Thanks again.

Chickadee Workshop was wondering what "happened" to all these clothes once they are outgrown.  DD#2, Mom of Sophie, packs hers up and gives them to DD#1 for Carlie. After Carlie has used them they are carefully packed away for the next generation, seriously. This is why it is called heirloom clothing. People in the Southern part our country, my birthplace,  have been doing this for generations, which I think shows such a wonderful respect for classic design and skill.  I distinctly remember my cousins children wearing the same dresses to Easter Sunday services that their moms wore and that their grandma, my Aunt Tita, had made them. If you study children's clothing, at least what is available high end, much of it has been made in the same style for years. Check out the Wooden Soldier catalogue for some great ideas. So, these little garments will be carefully cleaned and packed away with the archive tissue for the next group of babies.
*************************************************************************************

This brings me to my next project. I will call it Sophie's Cranberry dress.

My plan is a smocked yoke dress with puffy sleeves, very classic. I don't really have a pattern for this so will pull together pieces from different patterns to make this work. My inspiration is this dress from "The Best of Australian Smocking and Embroidery". The book has pictures and plates, no patterns or recommendations so you are on your own there. It is a great book however and I will do an adaptation of this design:


Sorry about the big glare from the flash against the glossy paper, but I think you get the idea. I'm not sure how I will work out the prints but I will "make it work." I am going to pleat this as soon as I am done posting and will start smocking tomorrow.

************************************************************************************

DH and I are trying to buy local for our Christmas presents as much as possible. We are blessed with many Amish neighbors but about 30 miles from here is the largest settlement of Amish in NYstate in a little town called Heuvalton. We have bought a few things from our local Amish farms but today took a ride to Heauvalton and went shopping on several different farms. We got all sorts of things from leather goods to baskets to aprons, etc. Here is a picture of the baskets we purchased froma sweet young couple who seemed so greatful for our purchase. It was clear they were just starting out. Mr. Zook signed and dated all of his baskets which I thought was just wonderful. They are really beautifully made. We also purchased from a Mennonite family, right here in our little village, some wonderful jellies that have quite a reputation. The jellies and some other local Amish and Mennonite treats will go into the baskets which will given to our loved ones. I am really excited about these gifts and also very excited about buying local. When it is a three hour drive to a Toys R Us, you can get pretty clever with your shopping and the best is that you learn in the end you really don't need a Toys R Us and you can help someone support their family. Buying local keeps the money local which we all know means it is not going off shore. Is there anything in your area that is unique and you have access to that would make a great gift for the holidays? If so, I would love to hear about it..........Bunny


The star basket is a lazy susan!

Tuesday, December 8, 2009

The Little Red Coat


Carly's little red cashmere coat is now complete. I had a dickens of a time photographing it. I don't know if there was too much contrast or what but these are the best pics I could get out of very many.  It does look much cuter IRL.
The pattern is from Gail Doane's "Sew Cute Couture". I did the following changes to Gail's wonderful design.

* I made the sleeves 2 inches longer to accommodate Carly's measurements. Gail's garment is really a swing jacket. I lengthened it 2 1/2 inches to get the length I wanted. The pattern is lined edge to edge so there was not much fudge room here. Therefore,


* I decided to make a free floating lining and do a faced hem to maximize the length I had available. I eked out every square inch of this piece of cashmere. On the lining you can see how it is just gathered and pressed flat in the pleat area. I thought if I did a pleated lining it would just bulk it up too much. this worked fine.
* I did bound buttonholes.


* I did a different configuration of the felted hearts on the coat. Just a personal design decision.
* I decided to do the big "hamburger" bullions on the collar only. All of the other hearts have more traditionally sized bullion roses.

Carly has v. short platinum hair and will be able to show off the work on the collar. Grandma's no dumdum.

* My fabric was 100% cashmere from Fabric Fix in Manchester, NH, purchased about two years ago. The lining was 100% cotton homespun.
* Buttons were covered with a lined piece of the homespun.
* Interfacing was a weft insertion. If I did this again I would use a much firmer interfacing for the collar front facing area. The soft cashmere really needed some stiffness up in the button area. Live and learn.
* This is Carly's winter dress coat and I know her mom will make good use of it. Carly and brother twinlet Zak attend a lot of birthday parties, going from the house to the van and back to the house. Carly will learn at a young age how to enter a room in a killer outfit. Doesn't every young lady need to know this? This won't be used for any outside play. Heaven forbid! So I did not do a flannel interlining. I had enough bulk to deal with as it was.
* Zakie is not forgotten. Grandma Bunbun will make him a felted Pendleton wool beret.
* Now Carly has her toile dress with the matching plaid piping, her cashmere cloche with the cockade, and her little cashmere swing jacket. Does it get any better than that?


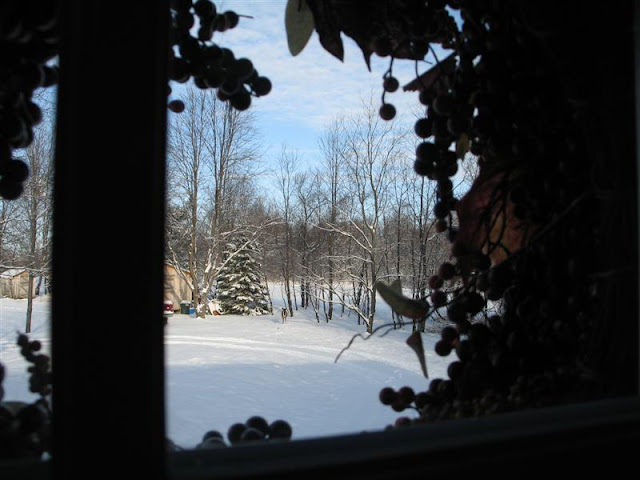
And check out this picture DH took this AM thru the window on the door and the wreath, too cool.

Yes, that's Bambi stopping by for a munch on the apple tree's last remnants of fruit.....Bunny

Sunday, December 6, 2009

Express Sleeves and Maxing out the Hem on the LRC

The coat is done except for the three buttons to be sewn on. Pics will be coming but its late and I also wanted to first share with you a couple of techniques I used.

I decided to use Nancy Zieman's "Express Sleeve" and I am very pleased with the results. It is easy and quick and gives a lovely tailored finish.

* First cut the two sleeves and linings making sure all markings are clear.
* Cut off the width of the seam allowance from the lining hem edge ONLY . In my case this was 3/8ths of an inch cut off the wrist edge of the sleeve lining.
* Sew the lining and sleeve together at the hem edge.
* Press to meld. Press seam open. Then match the armscye edges of the sleeve and the sleeve lining. This will pull up the fashion fabric to the wrong side the width of the seam allowance.


* Press the sleeve hem edge again with the new fold you just created.
* Carefully line up the seams of the sleeves taking cared with the junction of the fashion fabric and the lining fabric.
* Sew them all the way across taking care to match when you cross the intersection at the hem edge. You are sewing from  armscye to armscye.


* Press the seams open. This is a great chance to use your seam stick. My seam stick is a 1 1/4 inch dowel I bought at Joanns and cut to 18 inches. Love it. You can see I am using a press cloth which is critical with cashmere. Cashmere is very much like hair and scorches easily at higher heat. A pressing cloth is a must.
* Stitch the fashion fabric sleeve into the armscye in the manner you prefer. For this little coat I did a second row of triple zigzag stitching. Then I cut back to that but only in the underarm area. The SA was left in tact and pressed toward the sleeve for a nice finish, kind of a scaled down sleeve head. 
* Once the fashion fabric sleeve was lovingly pressed I reached thru and grabbed the lining and pulled it thru the sleeve. The underarm seams were matched up. The lining sleeve gets its SA turned under and pinned, then stitched to the coat lining.


  This really took just minutes and is such a nice finish. The sleeve is now done.

Another challenge on this coat was dealing with the hem, neck, and CF edges. Gail Doane's pattern is lined to the cut edge and then bound with bias. I wanted buttonholes as well as a longer length for my little coat. I measured my buttons earlier and new I needed to add a bit to the CF. Then I did my buttonholes. I cut an edge to edge lining but didn't really want that. I just don't have good luck with them, finding that they can easily bag in spots. It took me a bit to wrap my head around how I was going to get the needed longer length and the buttonholes in but here is what I worked out:
* My lining was cut edge to edge  and included the new additional width for the buttonholes
* The edges of the lining were interfaced like a facing from neck to hem. 
* I folded under and pressed the lining hem edge 1/4 inch and then turned it another inch. I triple zigzagged it to hem it.
* The hem of the coat was interfaced as well. I needed something to catch my hemstitches on. I fused on a weft insertion that I love, 60 inch width and all.
* I cut a 2 1/2 inch wide bias band for the hem and folded under the top long edge 1/4 inch and pressed that in.

* The collar was basted on. Then the lining was sewn on leaving the last 2 1/4 inches near the hem unstitched.
 * The bias band was placed right sides together and stitched to the bottom edge of the coat. I stitch around the corner, which I had rounded, and up to where the lining stitching stopped.This was then pressed.
* The hem was now catchstitched to the weft insertion interfacing.
* The lining bottom corner was folded in and hand stitched to the hem band.

The coat is done and waiting for the three buttons. Hopefully pics will happen soon. I think this will be a challenge to photograph without a child in it.  Till then........Bunny

Tuesday, December 1, 2009

Missoni "type" Top

I found this great fabric on the last Joanns clearance fror 2.50 a yard. There wasn't much left on the bolt but the top I was making didn't need much. Then I decided to change my mind on the pattern, started the layout, and with the matching required really needed some creative problem solving. I just did not have enough to match all the seams. Hmmmm,,,,I slept on it, and of course had one of my nightime eureka moments. The hip band on this pattern, Simplicity 3790, view B, had the bottom edge on the fold. If I added a seam allowance there and cut a facing for the inside instead of using the fold for the entire piece I could pull it off. I had enough to match the outer band and for the facing, well, who cares? So I managed to get it all matched. Made this puppy this morning within two hours. I think I will make it again it is so fast and easy.

Here is the blousey version and the back.


About the pattern Simplicity 3790, View C:

* I flat measured and then knew this would fit without any alterations.
* I decided to not do the inset and just leave the v-neck wide open. 
* I used two rows of a v. narrow zigzag, 1.0 wide and 1.5 long. Just wasn't in a serging mood today.

*Because the fabric was stretchy I stabilized the shoulder seams with some silk selvedge from my selvedge bottle. Do you cut off selvedges from your fabrics and save them in a jar? Comes in real handy.
*I used Steam a Seam 2 for the sleeves and bottom hems. Love that stuff!
*I did View C with the smooth hip band but cut the longer 3/4 sleeves. 

And that is about it, pretty simple, quick, and now RTW.

*************************************************************************************

Feeling better today but still seeing the doctor tomorrow. Thanks for all the good hints and wishes.

Thanks also for all of your feedback on the Channel jacket. The pattern is up for anyone who wants it. Just wing me an email and first one gets it. Sizing goes from xtra small to xtra large "ready to wear". Go figure! In other words all the sizes are in the envelope.

On the Little Red Coat I am doing the last of the bullion buds and should finish today. Then it is finally construction. The pattern is for an edge lined, bias bound jacket, no buttons. Mine will be a faced hem, to max out the length, separately hanging lining, and bound buttonholes. Keep you posted!

Here is a shot of the back yard at lunchtime. It is a grey dreary day with quite a few more predicted, just what I need for some happy stitching.....Bunny

Had to Refurbish This One!

    About  6 or 7 years ago , during the dawn of the Zipper Trend,  I bought one of my rare retail items. It was a blush pink and black bord...