Sewing Vloggers

Sunday, March 17, 2024

Had to Refurbish This One!


About  6 or 7 years ago , during the dawn of the Zipper Trend,  I bought one of my rare retail items. It was a blush pink and black border print georgette blouse. It had a 9 inch metal zipper at the back of  the neck  The rest of it's style was completely plain as you can see in this pic:


I loved this top. The fabric was what hooked me. In all these years, I wore it twice. I could not stand the zipper. First, I never liked the zipper trend to begin with. Second, the weight of the zipper pulled the ethereal georgette up and back and choked me the  rare times I wore this top. The length did nothing for me but I sacrificed proportion for my love of the fabric. You know how that goes. When purge times came around, I could never rid my self of this top. I knew I would somehow remake it one day, even it it was just part of a scarf. Well, that day recently arrived. 


I removed the zipper and turned it into a button loop slit. I gathered the sleeves for a nice little pouf and my preferred shorter length. Then I tied a black grograin ribbon quckly around the waist to alter the length proportion. I hope to improve on the belt situation, but you get the idea. I also added bra keeps to keep the wider neckline from exposing my straps and in place. 


(Pardon the poofies. I didn't fuss.) Here is how I did it. I love it now and will be wearing it a lot.


First, I carefully removed the heavy zip. Then I  went to the ironing board and spray starched the zip area and pressed. This allowed me to neatly meet all the cut edges together. This is wrong side up. I fused a strip of near sheer fusible tricot interfacing to the zip area and a bit beyond. The orange lines indicate where the xip was cut out. 


On the front I laid down what would soon  be the  facing. It was  a poly mesh, pink blush color I had on hand. This was then topped with tracing paper on which I drew out my stitching template for the slit. I proceeded to sew the slit with a 1.5 stitch length. Once done I ripped off the paper and cut the slit down the middle and into a triangle slits at the bottom corners, classic slit cutting. This was then turned to the inside and carefully pressed, presscloth, steam and low heat. 


Above it is complete. The facing was carefully stitched down around the slit about a quarter of an inch back, with a simple running stitch and single thread. It does not show on the front The same poly mesh was used to make a new binding on the neckline as well. 


The zipper you see above is in the dress form so just ignore it. The forms print is so similar to the top that it is hard to distinguish, So sorry.  I did my button thread loop by placing 3 strands of embroidery floss on a piece of  Stitch and Ditch. They were about 8 inches long. this was so I could later thread them and sew them to the top. I lined up the strands on the paper and did a tight small zigzag stitch on my  machine over the  strands. It makes a really nice thread for the button loop. You have to carefully measure first exactly how much length you need to make the button loop function and get around the button. I drew that out on the paper. You stitch this in the very middle of your strands. This leaves you with floss on each end to put in a needle and sew on to the blouse and secure the loop. Hope that is clear. I thought of this one day and it worked out well. Give it a try. 


For my sleeves I simply zigzagged over 1/8th inch elastic. I also took the moment to try out the ban roll techique for the hem. It worked out well. The hem edges discolored, I assumed from hanging out in a storage unit for about a year. I soaked to no avail so I just cut off and rehemmed which was fine. 


I love my pretty pink and black top. I think it will be great for Easter dinner.  I have never been able to part with great fabric, whether in a garment I made, bought, or thrifted.  I believe it can always find some sort of second life. Happy Sewing, all................Bunny


Sunday, March 10, 2024

The Velvet Bomber Jacket, V1877


Zipped!


Unzipped!

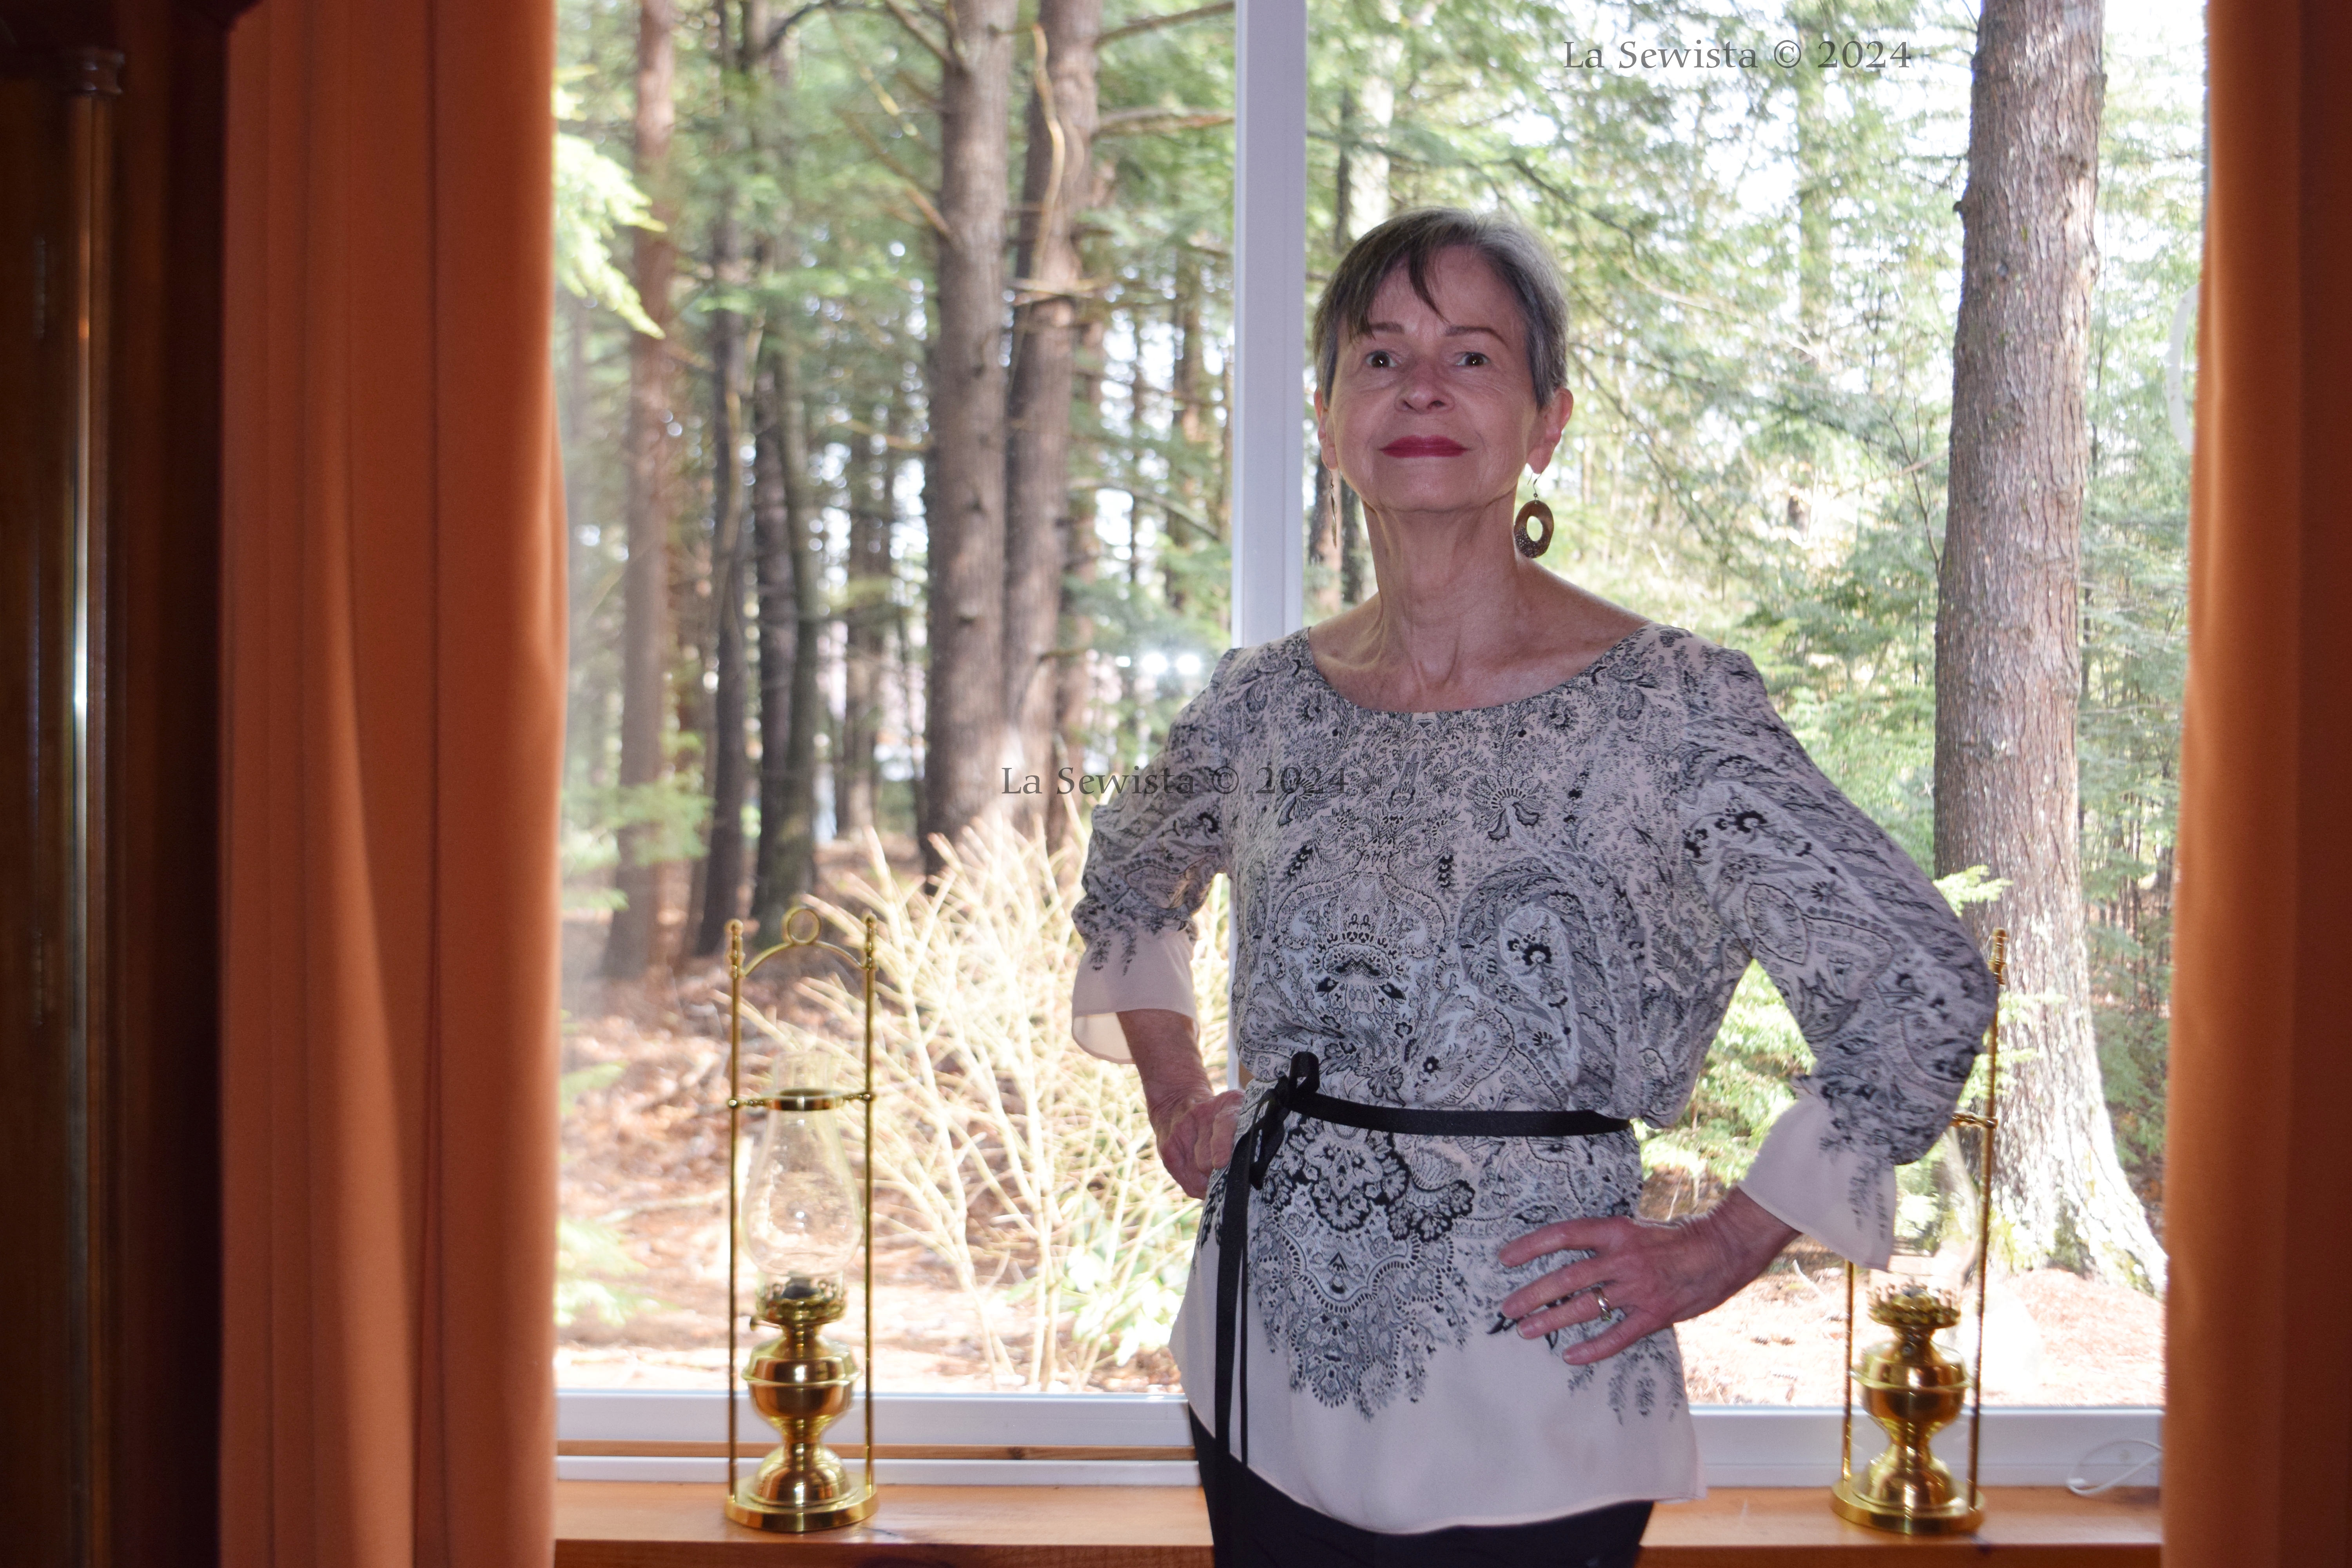
I absolutely love my velvet bomber jacket. I have worn it almost constantly since I finished it, with jeans, joggers, turtlenecks, you name it. I've worn it "out", to the market, and everywhere else. It is so versatile and so warm. There were times I thought I would throw it across the room and never look back but I am so glad my persistence won out, once again. I just can't walk away from a project. There is ALWAYS a way thru!

Pattern:

Bomber jackets seem to be all the rage right now but truthfully, they have always been in fashion. This design was usually seen on the testosterone filled side of the runway but like much in fashion, today it is universal in regards to gender. Yay, for that! It's comfort and versatility are certainly to be enjoyed by all. Being sewists,  we can make our bombers out of any fabric we want, a great opportunity for expression! I had a specific vision in mind and took to Google images for more inspo. What I found were two versions, one being just what I wanted, a shorter, fuller, version with a more defined waist. Most versions, and this definitely applied to patterns, were cut stright down from the chest to the hips, had no shape definition other than being rather closely fit, like this. 


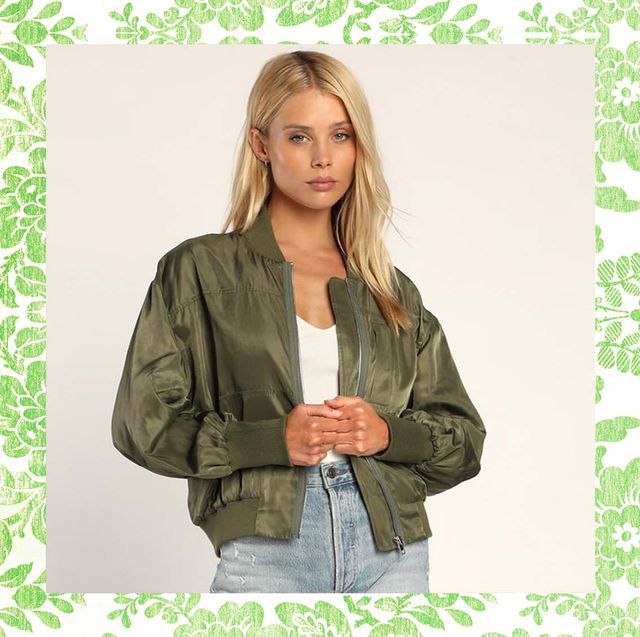
What I had in mind was more of an "urban" look. These were fuller sleeves that were either dropped or raglan and ribbed hems that were closer to the waist, more like this:


I apologize in advance if the images disappear from their vendor sites. I searched patterns all over and could not find what I wanted. I settled on Vogue 1877. a unisex pattern, and did adjustments to achieve my look. Of course, half way through my jacket sewing, I happened on the perfect pattern, so I offer it here for you if you like this look: TCP4 The Bomber Jacket from Trend Patterns.  I found it with a search on The Fold Line. 


Fabric:

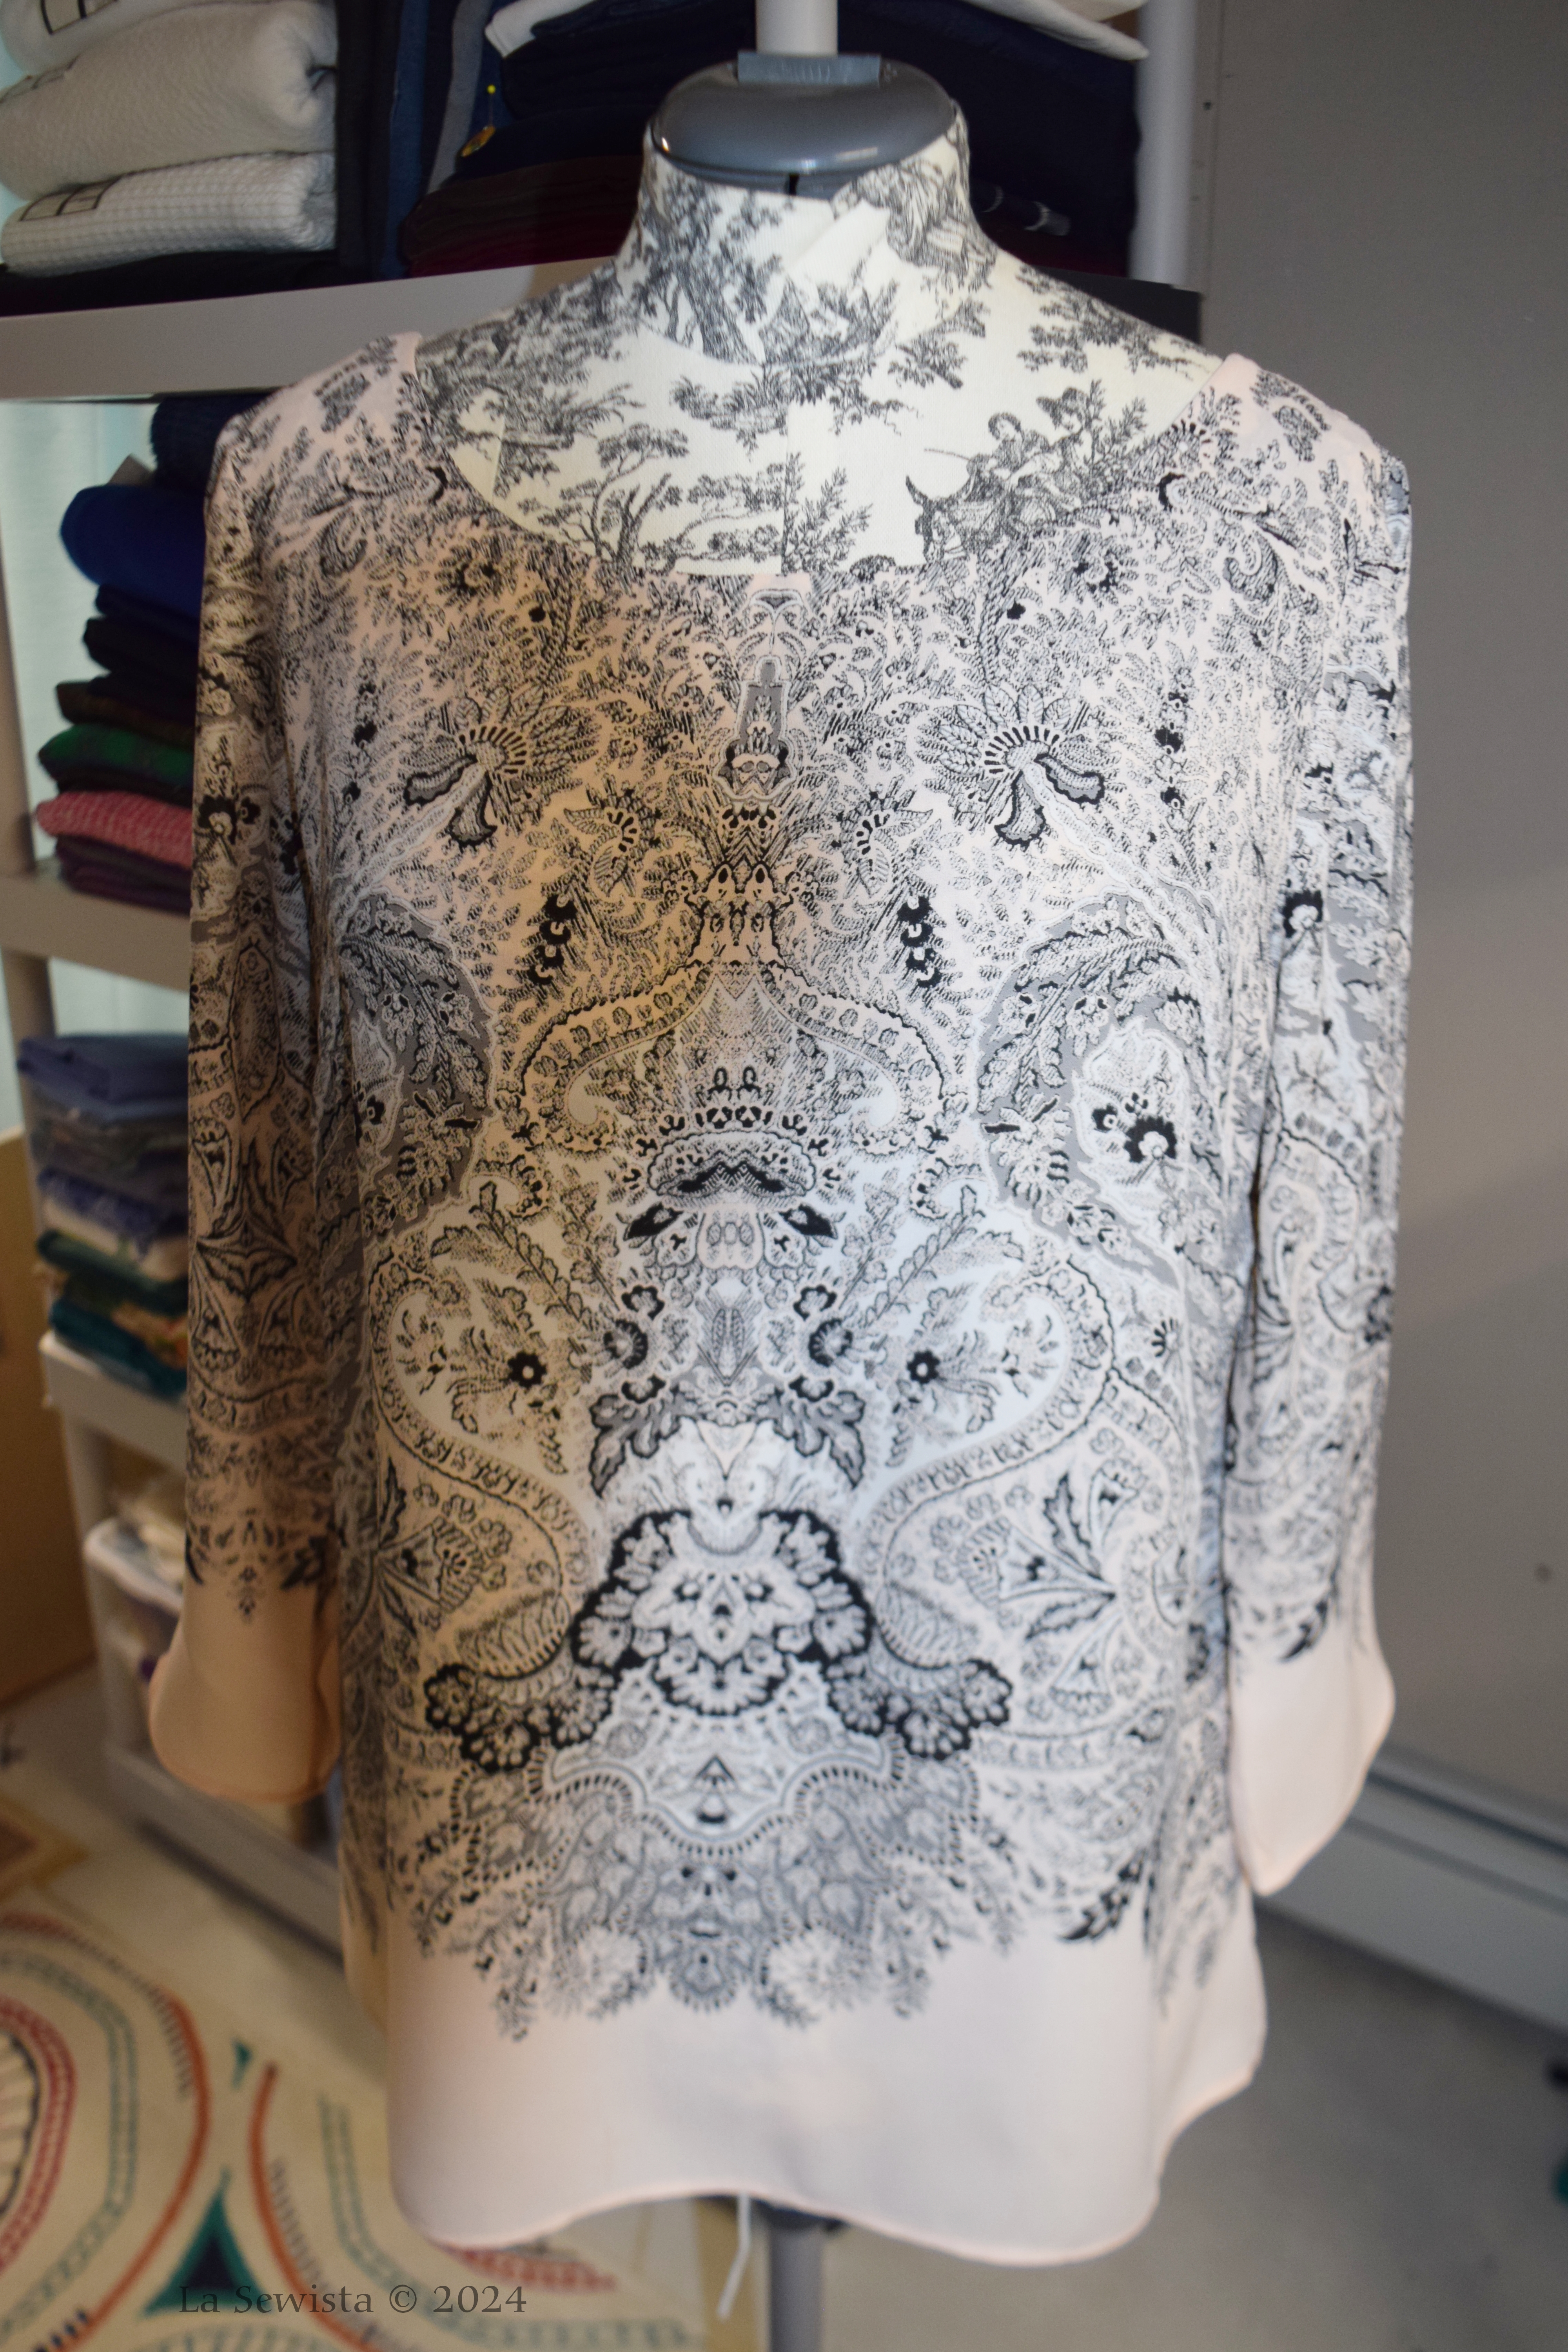
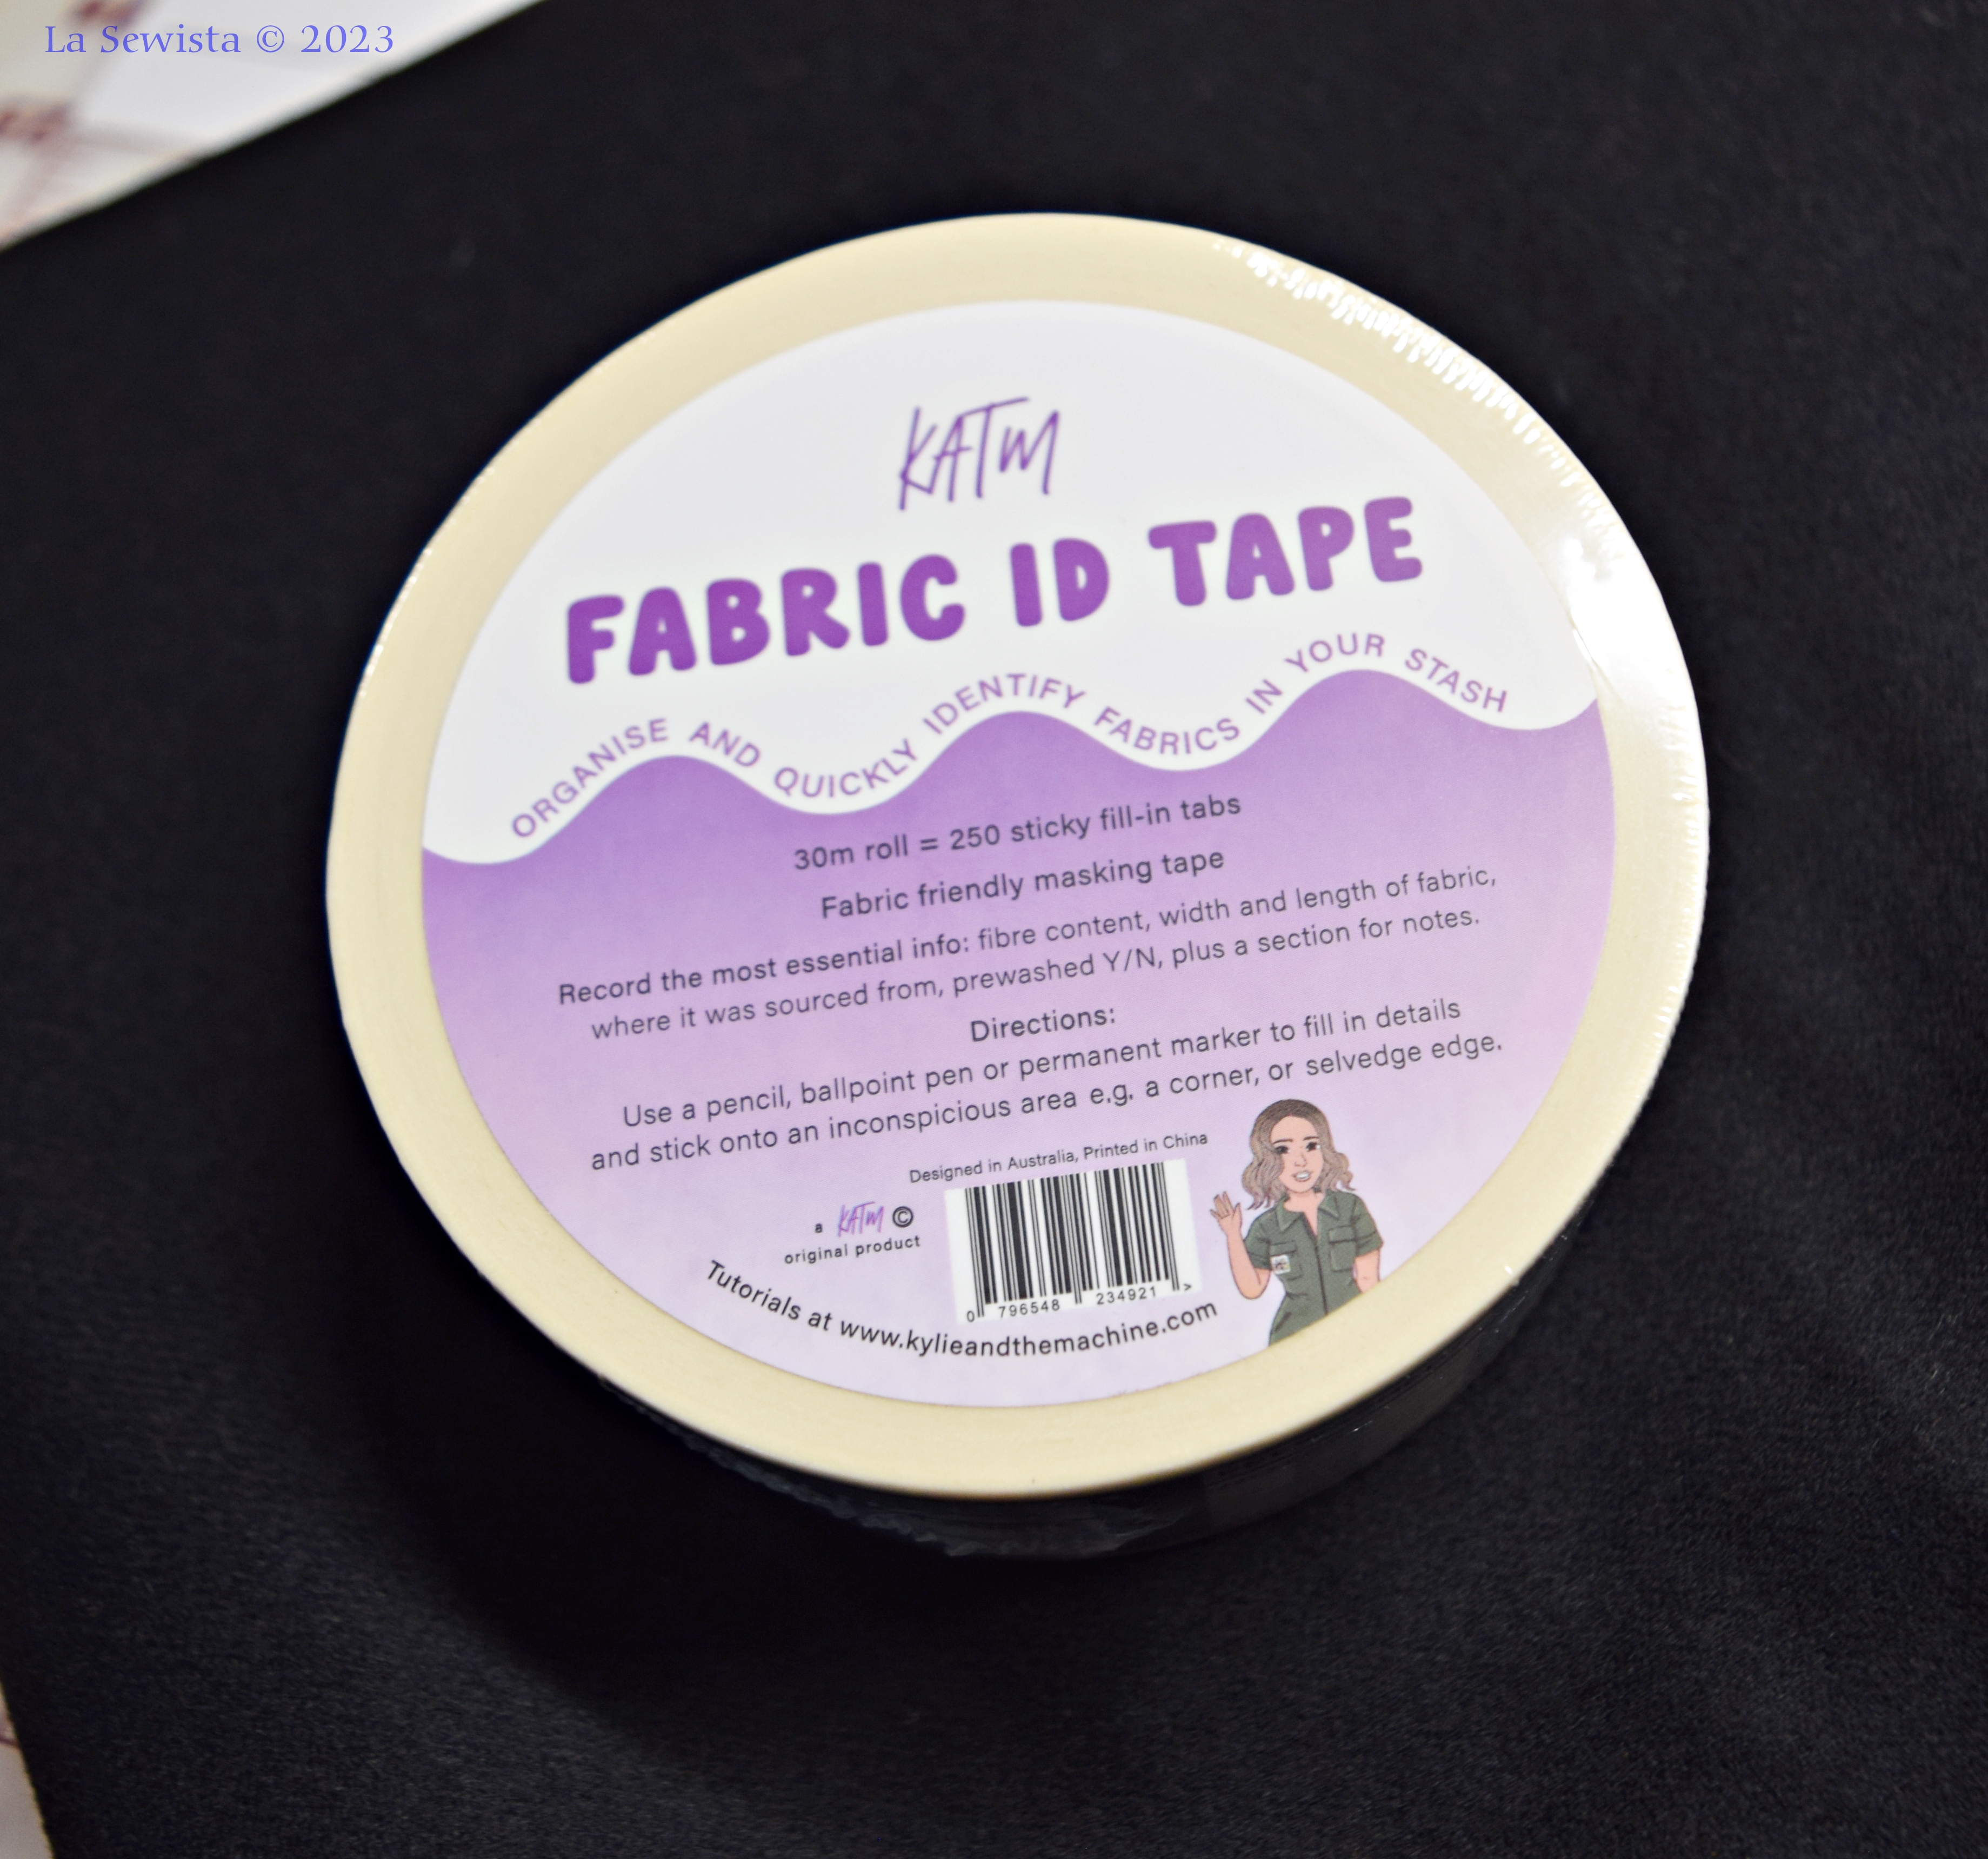
This was the interesting part! I've been doing a lot of reorganizing of my fabrics lately, mostly because of those labels I purchased that let me write down the yardage and other info on each piece of fabric I own. I have some really lovely pieces, some for a life I rarely live. I bought this beautiful cotton/rayon velvet online a few years ago with intentions of making a blazer type jacket for the holidays. My blazer days seem to be gone. If I made it, it would probably be a one and done.  Lately, fashion changes have given me permission to use more formal fabrics for more casual clothing. As I measured  out this piece for its label, it occurred to me that I could make a bomber jacket with it and could get a lot more wear out of it and it would be beautiful. I proceeded! 

The outer shell is a cotton/rayon velveteen. It has been machine washed and dried, no shrinkage and looks fine and lush. Washing velvets is something I have subscribed to for a long time. It makes them practical and changes their hand to a deep lushness. Don't  believe me? Wash a good sized sample on warm and dry. You'll see. 


I needed warmth and was not going to rely on just the velvet for that. This was a transition piece for 30 to 50 degree weather. It has worked out beautifully, very warm. It is lined with my favorite Kasha, a flannel backed Satin, perfectly luxe and warm. 

The rib knit was my issue. I am not experienced with rib knit other than on a long tee shirt or two. I've only used what I picked up at Joann's. I went to Etsy for nicer, heavier offerings and ordered what was for jackets, "great for varsity jackets".  Sounded good. It came in and damx, it was thick but I figure this was what I was supposed to use and proceeded. One of the first things to do on this jacket is install the zipper. Between the zipper, the rib knit collar layers, the Kasha layers and the velvet layers, this was incredibly bulky to sew. I pressed my velvet and clapped it down!!!  A stiff brush brought the nap back up pretty easily, which I owe to the prewashing. It was just a  very unpleasant experience all the way through, sewing all those heavy layers felt like stitching a rubber tire. I had to do a lot of the finishing by hand and that stunk as well. I was not excited to work on this so it happened in bits and pieces while I worked on alterations for customers in between to keep my sanity. Once done, I tried it on and was sooooo very happy. It was worth the aggravation. Then I wore it out on a 45 degree day and was overjoyed, wore it with jeans and a turtle to the supermarket. It felt so warm and nice. Persistence won the game once again.

Construction: 

First there was the zipper. A facing of the velvet was attached to the Kasha lining. The coil zip was in between the outer velvet and the the velvet facing. At the very top it met the corner of the rib knit collar. I set the collar back about a half inch and was glad I did. It gave the end of the zip a little extra space for all the bulk involved there. 


This pattern had two collars, one a big camp collar and the other a high stand up collar. I wanted a real rib knit bomber collar. No pattern!  I pinch hit and it came out OK. I just folded the rib knit and cut out a crescent. Fingers were crossed and whew,,, it worked. Every seam was bulky. The next thing that was a bother were the shoulder seams, a definite pattern issue. I have seen this on more patterns, both indie and the big guys. The pattern gives you a clear dropped shoulder. Then it has you attach a sleeve with easing. There is no bump, lump or bone for the fabric to go over where these seams meet and therefore no need for ease. Well, you've got it and you are left with unsightly easing puffs in the middle of your bicep. I steamed the bejeepers out of this seam to rid the sleeve of this easing puffiness which would have been fine if the sleeve had to go over a shoulder bone. Someone behind a computer, at some point, stuck a regular sleeve on a dropped shoulder, never having the knowledge that no enlargement would be needed as the sleeve draped straight down the bicep. Trust me. Take a look at dropped shoulder patterns. You will see this mess everywhere. Check any dropped shoulder patterns you do so you can eliminate the extra before sewing this area. Luckily, my velvet took the abuse well, as you can see above. 


The jacket had welt pockets. While I like welt pockets, these are uncomfortable to use. They are set too high and in just a weird spot. Having looked at other such pockets in my research, they were also set in the same weird spot. They don't look bad. They just feel bad. You can't lower them because the pocket bags have no place to go. Nature of the beast, I guess. They are pretty, though. It had been a while since I had done welt pockets so I watched a lot of vids and did many samples before committing. If you do a mockup for your bomber jacket, make a pocket, just one, and make sure you like it. If you don't, just do a faux pocket, a lot less work.  Also, just look closely at the pockets in the pics above and you will see what I mean. 


Fit:

Lately, in my body changing journey, my shoulders have started to slope down. This jacket really emphasized that. I added 1/2 inch raglan shoulder pads and it GREATLY inproved the fit. These are tools that are out there for you to use, not just laughable objects from another era. This pattern specified a lot of topstitching. I did the yoke first and did not care for the look. I did not do any more. 


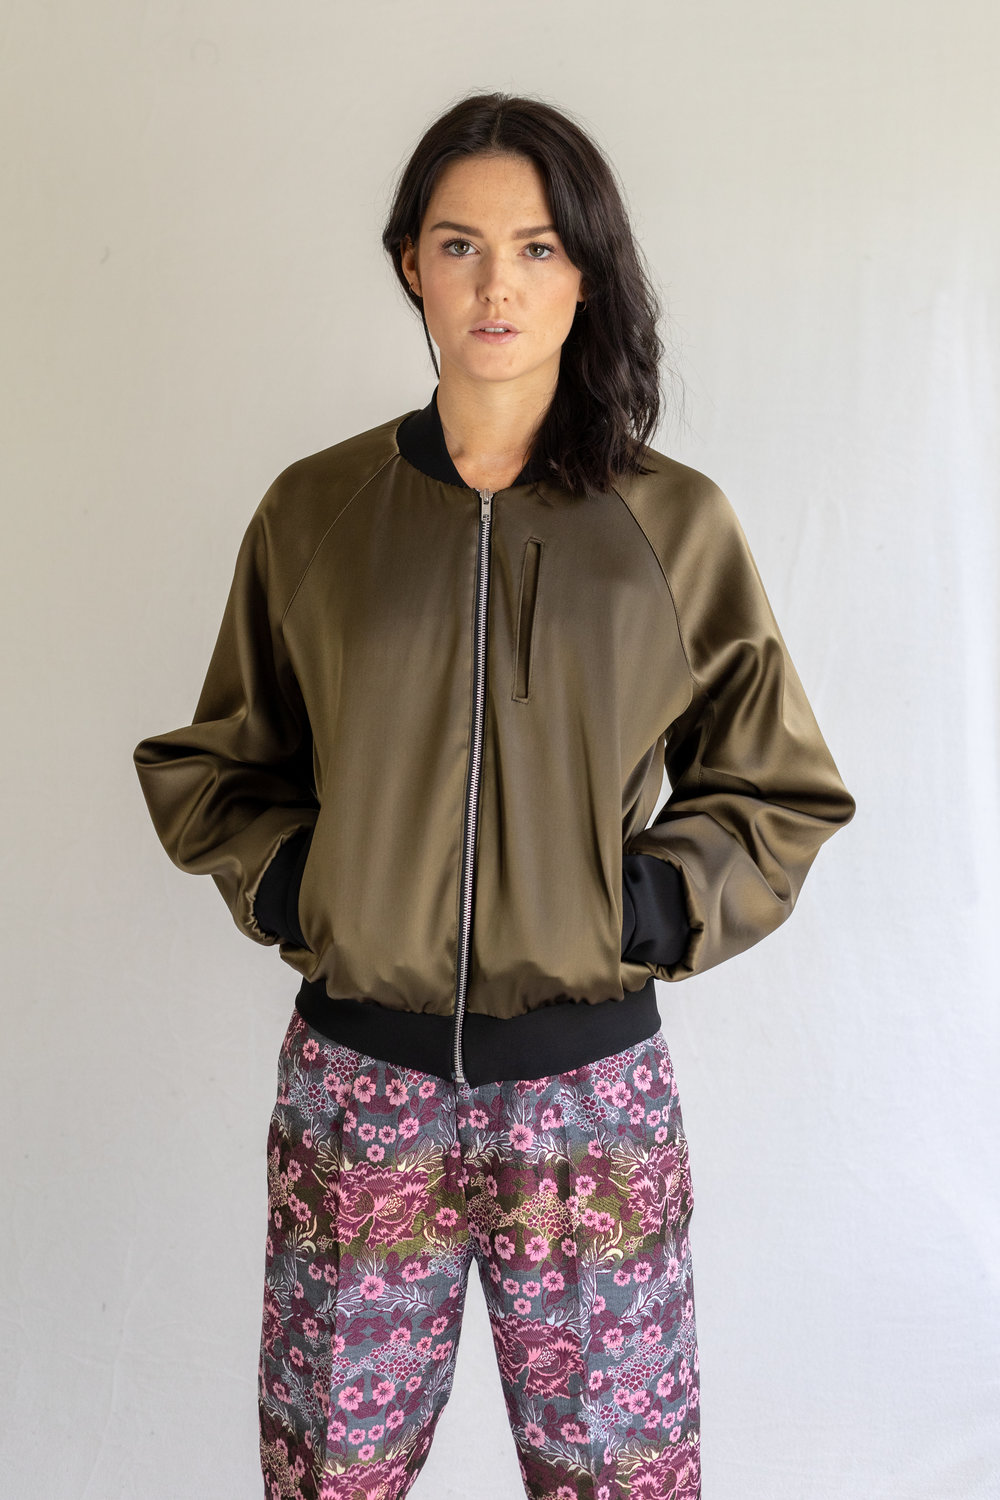
I reduced the length of the jacket by 2.5 inches. I tightened up the rib knit hem band by to be closer to  my natural waist rather than hip size. To make the jacket bottom fit the smaller band, I did tucks in the back and front. It was all too heavy for gathering. It worked out fine but added even more bulk for sewing in those areas. I shortened them an inch but kept the fullness in the sleeves as I saw that fullness a lot in the versions I liked. See the brown jacket above. There is a lot of ease in this pattern as I have often found in unisex patterns. I kept it and did no FBA or petiting.


In Conclusion:

I love this jacket and foresee getting a lot of wear from it. All parts have withstood my  prewashing so I can see it giving me years of joy and warmth. It is so comfortable and warm and just perfect for when our temperatures are not brutally winter but still chilly. It can also be casual or dressy. I love it and highly recommend the pattern as well as being a little daring and making it up in a bold fabric, perhaps a brocade or velveteen or how about a beautiful organza? I hope this inspires you. Happy Sewing........Bunny


Friday, February 16, 2024

Three tops and more to come!


I have three tops to share with you, made between Thanksgiving and New Year's , I think. With the old year behind us, much is blur. These are part of last year and I am now working on this year's projects in earnest. You have seen me make these patterns before. They are tried and trues. I like to think the fabrications are unique and make them worthy of a second look here. I've tried different techniques each time. The first that you will see are two new Eureka tops. I believe they are number 6 and 7.   A search will bring up the others. The Eureka top is a very basic cut on sleeve tee shirt from the Sewing Workshop. It is the simplest of designs, therefore lending itself to all sorts of interpretations and play. It is large, boxy and so forgiving of fit. I highly recommend it. I did a bit of research and found that McCall's 7721, view B,  is nearly exact to my ruffled sleeve version presented here. I think it may just be a bit less boxy. 


I could wear it now with a turtleneck underneath but will save this for warmer weather. The fabric is Lady McElroy and it is called "EPIC Spectacles". Make sure if you order it you ask for Epic as you may get the tiny faces as I did on the first purchase! Stone Mountain and Daughter carry it and were the ones to eventually provide me with the Epic version and were great to do business with. For the ruffles I simply cut a six inch wide strip the length of the sleeve opening and made that double the length of that opening. Next I sewed the short ends together. It was then folded in half, pressed and then gathered and applied to the opening, very simple basic ruffle technique. Seams on here were French seams except for the ruffle attachment which were machine stitched then serged. 


The Eureka pattern has no closure. I wanted one and I also made the neckline opening a bit  wider. 


I made a simple facing for the slit area and backed it with woven interfacing. Because I did not want any bulk to show through, I zigzagged and pinked the edges of the facing. No bulk! I did a simple thread loop by hand for the tiny vintage button and applied a bias binding as I always do.   I think this shirt is great fun and can't wait to wear it in the warmer weather. 


With the second Eureka, the party is all in the back. 


Pardon the photo. For some reason the fabric is really shiny. IRL, it is not. 

On this Eureka I did the sleeves as directed in the pattern, with a simple fold-up cuff. I always cut the extra small size.  This is a big garment and I like it.  


The back got a square cut out and I tied it across at the top  to prevent gaping. I also didn't want it hanging open for viewing to the public as I moved  around. The facing was understitched but also held down with French knots all around. I also ran a strip of boning in a channel across the bottom edge of the square cutout. It fits in very snugly and you don't even know it's there. Its snug fit keeps it in place and I can easily take it out for laundering. The cutout square stays nicely placed on my back with the weight of the bone and no facing rolls out. I gave it a trial wear to make sure.  What type of boning did I use? A white electrical tie, cut on the ends in a curved shape so not to irritate. 


The fabric was the fun part here. It came from a floor length tee shirt dress that also had white ribknit neckline and cuffs, Think golf shirt. I got it at Good Will and  was size XXL. On my first trip there in a long time, I saw it and fell in love with its hand painted water color style. I left it on the rack. I went back a couple weeks later and it was still there so I grabbed it. It was a very cold day and this type of garment would not be moving easily out of the door into the winter's cold right now. I brought it home. The fabric is all poly, I know, yuk, but I felt the lovely print would make up for any issues I might encounter with heat. The design of the top and its  loose demeanor make me think it won't be too hot. I really like it. 

On to top #3!


Oh, how I love the Imby top by Karmme Apparel! I didn't use a shower curtain to make this one! I did use a lovely fabric. It is a rayon slub, near sheer,  leftover from a prior project. You can see more on the original project here. 


The bodice lining/collar were made of a really nice rib knit. 


 The bodice was topstitched pretty much everywhere and the lining was understitched with a triple zigzag up to the shoulder seams. I hand stitched the collar down with a hemstitch underneath. It just kept wanting to turn back. If I did it again I would interface the turnback area. There is no interfacing in here now. The Imby top is a lot of fabric and should be heavy but it looks best with a light fabric making up the skirt and bodice so is very comfortable to wear. I think it will be delightful this summer and great with white jeans. I need to get some of those! (that fit)


The Velvet Bomber Jacket is c'est finis! I am just hemming the lining area by hand. This was not difficult, just extremely bulky to work with. The ribbing was like working with a rubber tire. Add in the heavy lining and fashion fabric and it tried my patience at times but I got it done. It could be better and I think it was one of those patterns you had to work thru the first time and then get it right the second. I'll review as soon as done, hopefully in the next few days. Then it will be on to sewing for summer and my vacation at the end of June. Happy Sewing..............Bunny

Monday, February 5, 2024

Ahhh, the Fabrics! and Life!


Isn't this fabric a lovely breath of fresh air? I think I've gotten to the point of wanting to work with just spring fabrics. You see, my husband and I have just returned from the land of Covid, not our first visit but definitely our worst. We are both fine now but this one was a doozy, phantom smells continue, loss of taste for a while, EXTREME exhaustion, sleeping around the clock for days, We made it through. I didn't do much but I did manage to sew thru despite my covid fog brain. I did it in bits and pieces and had to walk away from my velvet bomber jacket for fear of messing it up. I stuck to mending, upscycling and reorganizing my goodies, then back to bed. Oh, I did shop!!! And I am excited and will share those plans with you. 

I have enough fabrics now to keep me  busy way into summer and it's just a matter of picking what will be next. That changes daily. Above is a large tablecloth, 2 yards, that I stumbled upon as I looked at the new Spring home goods out in the market place. I couldn't pass it up. It may become a top or it may remain a tablecloth. I like the texture and drape of the fabric, a poly cotton blend. That is on the bottom of the list for now but it does scream SPRING! 


This marvelous textile is one I purchased at Canterbury Shaker Village up here in New Hampshire. It actually was a sunprint that made up a tote bag. I thought surely it was destined for a use more refined. The bag was supermarket grade. The picture was closely woven and the subject divine. It is 24 inches wide, all cotton and removed from it's bag and the lovely Shaker girls smile at me while I work in my sewing digs. I haven't come up with a final idea for this but it makes me happy. 

I will be all over the place with this post so be prepared. 

I made undies while sick, not much brain power required there. I made pink ones. 

I made red ones. 


I made blue ones. 


I made over a dozen pair, bit by bit, You can see my methods.  I actually prefer my leg and waistbands out of more fabric. I had the laces and stretch picot already cut  so went with it. My favorite are the pinks, so so comfortable, like clouds. I also sew on my trims, turn to the inside and then topstitch with a triple zigzag as you can see in the pics. The red and the blue are ITY, nice undies but so very slippery to sew. The pinks are poly knit. All have 100% cotton crotches and I find them all comfortable.  I picked at these as I had energy to do so while sick. 


Guess what else happened while sick? I fell in love! It was with a beautiful British woman named Lady McElroy.  And,,,,,she designs fabrics! I was totally smitten. I was watching lots of tv/youtube during this time and saw two different tubers show the above fabric. I was like an addict searching for my fix once I saw this. The faces were large and just so intriguing with their glasses and lack of expression. I had to have this fabric. The colors were fabulous. I didn't know who made it or what it was called. I managed to find it  with an image search and it was called Spectacle. I proceeded.  


I found my spectled ladies from an Etsy seller in Canada and quickly placed my order. Did I say I bought from a thumbnail? Issues ensued, which she handled wonderfully as there was fault on both sides but all was OK, sort of, in the end. You see, This fabric has "Spectacle " in it's name but there is "Mini" spectacle and there  is "Epic" spectacle. I wanted "Epic" (didn't know that) and had ordered the "mini". BUT, for whatever reason, she shipped me two pieces of Mini Spectacle, the other being the darker rendition, all mine to keep. 


I kept my "Mini Spectacles" , thanked her for the freebie and kept up my search for the "Epic" version. I found it at Stone Mountain and Daughter! Yay! I immediately bought my yardage. They double checked that I was getting the larger, Epic faces and confirmed it in writing. They were wonderful to deal with and I made my shirt. More to come on that! All I can say is there are lots of ladies with glasses staring at me right now while I sew!

Another fabulous Lady McElroy piece I bought is this one above. I call  it my "Fashionista" fabric. If you look closely, click to enlarge, these women have all the latest and greatest fashions and I love their hair and faces. They have joggers, Marlo sweaters, white sneakers everywhere and more. Have fun picking out the trends! I think I will make a Melody Dolman out of this one. We shall see. 

More Lady McElroy fabrics:  Another fabulous viscose and a luxurious 100% cotton wide wale corduroy


So add this to what is already in the resource center and I am ready to Spring into sewing now! My bomber jacket just needs the hem sewn up into the lining. All of the rest is complete. It was quite a project, mostly due to bulk. I can't wait to show. I think it will give me years of wear.  Happy Sewing. Be healthy all!..........Bunny


Velvet sleeves, HEAVY duty rib knit cuffs and Kasha lining, ready for stitching. 

Friday, January 12, 2024

Notions, Patterns and Fabrics, Oh my!


I haven't used one of these in 20 years. I don't even own one of the little red nosed thingies. Have I stabbed myself with one of them once or twice? Oh, yeah., right in that tender part of the palm. My first change of tool was the single edged razor blade. I used that for years. It had that cover on one side of the blade. It had to be safe, right? Well, it was. No accidents ever. But, I found better. For the past ten years my seam ripper of choice has been the scary to many but high performance box cutter blade. Those pointy corners were a dream for digging deep into jeans and such. 


Thanks to Jennifer Stern and an hour you-tubing. I have found something even better. I really didn't think anything could beat my beloved Stanley pack of 100 of these blades but thanks to Jen I have found it. It is safer, so effective, and works incredibly effortlessly. Meet the "Kai Seam Remover". As Kai says " Its unique design allows for fear-free "unsewing". It does. There is no tugging, digging or pulling. It works surprisingly smoothly, something you have to actually experience. 

 Closeup you can see the blade is sunk between the little concave indentations. You can't cut yourself. Is this looking familiar?


It might. Many women use this exact type of instrument to shave their faces, maybe  eyebrows or lip areas in particular or maybe the entire face as two women I know well do. (You'd never know.) So if you want one, go to the drug store or discount store and buy a pack in the eyebrow shave department, 3 to a pack for the same price, no shipping.  Get the longer face shaver not the short eyebrow only shavers. Next...............


I think this is one of the best notions I've purchased in a long time. It is "Fabric ID Tape" from Kylie and the Machine. This big roll will have enough ID tape to label 248 pieces of fabric, yahoo! I've got about a 1/4 of my stash done so far and haven't made a dent in this roll.  As I've said before, my stash is not that big. ;)


Kylie promises it won't hurt your fabric and I test each label on a corner of fabric to make sure. This sticks and doesn't harm. It is very easily removeable. You are able to put fiber content, measurements, pre-washed?, source and there is plenty of space for additional notes . I added things like "fade line on fold" or the date purchased and such. Then I stuck on top of my nice folded fabric and put the fabric with its friends and can immediately know how much I have as I peruse options. I love staring at my folded fabrics on the shelves. As ideas hit me, I can know immediately if I have enough to make them work, no removing anything from the pile. Leave it


to Kylie to come up with this cleverosity. 

****************************************

It could be her voice, so unique. It could be her impressive skill set. Maybe it's even the tropical birds chirping in the Bolivian background. Katrina Trinidad could sell me anything. She sold me the "Melody Dolman" top pattern by Love Notions. You know I am a born and brought up Big Four woman but I work in a few indies here and there. I like experienced designers, tested out by the masses with results I  approve of.  It's a short list. When I do buy an Indie, because of their heavier expense, they have to offer me options, potential for great creativity. A One and Done at 18.00 does not do it for me.  A perfect example would be my Sewing Workshop patterns. I've done 3 Picasso Pants, I think 7 Eureka tops (some yet to show you),  maybe three Tea Garden Tees and more. You get my drift. I want my money's worth. I've watched Katrina work magic with the Melody Dolman top and started to get my own ideas. I think it will be perfect for our summer vacation. I saw her make a thrift find into a Melody Dolman dress, her own invention. This type of creative possibility really sparked me. This is one of the two Indie Patterns I have invested in lately.  In my head I am already adding seams,  inserting yokes,  gathering ruffles, etc. Its what I like to do.  Thanks, Karina.  The design is so simple but I like that. It offers so much creative potential. 


My next purchase was inspired by Sarah of Sew Sarah Style.  Now, Sarah looks great in all that she sews and wears. I liked the "Dila"  dress on her but her links to the designers from "Notches" and their designs really caught me. I chose the "Dila" dress for myself. It has 27,. yes, 27 different versions, no expansion packs to rip you off! I like it for its full length everything version in orange. I see it offering great opportunity for painting, embellishment, etc. It really sparked my creativity and again, offers lots of opportunity for many makes. I really look forward to making this and have great fabric in house ready to go. It's different and me.  The company "Notches" has an interesting and impressive pedigree. You might enjoy checking them out. 


These are the notions and patterns I am excited about right now. Both notions have been working wonderfully and the patterns will happen soon enough. I have lots to say about the fabric so that will get it's own post in a few days. There are some interesting pieces. I hope you will join me to share in the fun. Until then, Happy Sewing..............Bunny


Had to Refurbish This One!

    About  6 or 7 years ago , during the dawn of the Zipper Trend,  I bought one of my rare retail items. It was a blush pink and black bord...